I used this chart to obtain the Kawasaki color codes:
* Last updated by: BIGO70 on 3/25/2020 @ 12:01 PM *
 |
 |
 |
 |
 |
 |
 |


Page: 1
Created on: 03/22/20 08:42 PM
Replies: 6
BIGO70

Joined: 09/19/19
Posts: 188
Rook

Joined: 03/28/09
Posts: 20589
RE: Lower Fairing/Frame/Swingarm Paint
03/24/20 2:29 PM
The factory applied frame paint actually is a dark grey as probably everyone has noticed.
What I noticed with the Color-rite jar color is that you better apply it very thin or else it will look black. It's probably the exact hue but the optical effect is created by a transparent film showing the lighter colored metal showing through sort of like a watercolor painting. I would suggest trying a can of Dupli Color Perfect Match Flat Super Black for frame touchups. No metal flake at all but it has a body color that is a dead ringer for the plastic of the ram air covers and the instrument cluster. You can apply it opaquely and it dries to a dark grey.
If you look closely, you will notice none of the frame color pieces are exactly the same tone all over the bike. Use the battery cover as a cold sample for the clutch cover and you will surprised at how different they are. I just accept it. The frame paint is sprayed on pretty thin and transparent so factory painter can't achieve a uniform tone all over the bike. No biggy. The slight variation in tone is disguised by the soft gradation of the spray gun. I guess I'm saying "don't expect any particular frame color touchup to match perfectly." If you need it to be perfect, you just have to paint the whole part over bare metal like they did at the factory.
* Last updated by: Rook on 3/25/2020 @ 2:19 PM *
BIGO70
Joined: 09/19/19
Posts: 188
RE: Lower Fairing/Frame/Swingarm Paint
03/25/20 11:28 AM
Do you have the paint code for the Color Rite jar you used?
How did you use the DupliColor Can to touch the frame up?
Did you spray some from the can into a cup/bowl and then apply it with a brush?
Or
Mask the scratched area off and then shoot it with the can?
Thanks
* Last updated by: BIGO70 on 3/25/2020 @ 11:44 AM *
BIGO70
Joined: 09/19/19
Posts: 188
RE: Lower Fairing/Frame/Swingarm Paint
03/25/20 11:41 AM
After a bit more research, it appears that the Color Rite paint for the frame is Kawasaki "18R".
This can be found by looking up the frame part # FRAME
I then used the below reference chart to get the actual Kawasaki color code Paint Chart
Here is the Color Rite product:
* Last updated by: BIGO70 on 3/25/2020 @ 12:00 PM *
Rook
Joined: 03/28/09
Posts: 20589
RE: Lower Fairing/Frame/Swingarm Paint
03/25/20 2:06 PM
 don't worry about it BIG. LOL I was wrong too! I checked the the Dupli Color Perfect Match rattle can I have and the color name is Universal Flat Black. It's not black and the finish is not totally matte, it's a deep grey with a dull sheen to it. I edited my previous post.
https://www.jegs.com/i/Duplicolor/318/BUN0104/10002/-1?msclkid=f4f0dbd0111713f56d3b85aba179e4e4&utm_source=bing&utm_medium=cpc&utm_campaign=BSC%20-%20All%20Products&utm_term=4579328492864333&utm_content=All%20Products
Do you have the paint code for the Color Rite jar you used?
How did you use the DupliColor Can to touch the frame up?
Did you spray some from the can into a cup/bowl and then apply it with a brush?
I did do a rattle can job on my clutch cover using a black metallic dusted over with a metallic grey engine paint. Wet in wet so they mix a little, one rattle can in each hand spray both at the same time pretty much. I touched it with a quick blast of transparent blue last. It matched the battery cover fairing perfectly. Put it on the bike and it was too blue compared to the other engine covers but not bad. That's what I mean, the frame color isn't exactly the same all over the bike. Probably depends on what kind of surface it is applied and how heavy the application is. On that note, the clutch cover I bought off an 06 was more like a true black. I'll betcha the paint color for the 06 is the same as my 08 and you 14R. All depends how heavy it is applied.
I have sprayed paint from a can into a plastic bag and applied that by paintbrush. Works fine, just be ready, that bag will inflate with propellant in about 2 seconds. Just blast it into the open bag and let it run down and collect in the bottom. Do it outside, it's a mess.
Mask the scratched area off and then shoot it with the can?
The real way to do a touch up is to sand the whole piece lightly and paint the whole thing. Sand and spray the nicked areas until they are filled in and level. Clear coat and polish. I really think that is the only way to do it perfect unless you are a super pro with these materials.
If this is a small spot your concerned about, I would do it the isolated way on your brand new bike. The flat color is really not hard to work with. Flat colors do not show imperfections very much. Go back and hit it again in a year if you need to. If you ever decide to paint the whole piece, no harm done. If this is a small spot use a paintbrush. Clean/thin with acetone or lacquer thinner.
* Last updated by: Rook on 3/25/2020 @ 2:17 PM *
BIGO70
Joined: 09/19/19
Posts: 188
RE: Lower Fairing/Frame/Swingarm Paint
03/25/20 11:08 PM
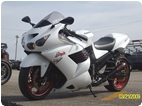
What got me started down this rabbit hole is that I was looking for a used OEM lower cowl specifically for my 2013 Pearl Stardust White bike. (I had a thread about it)
I couldn't find an OEM lower cowl in the correct OEM color (18T) so I was forced to buy one in a different color and try to match the paint.
I THOUGHT I had found the correct Color Rite paint but instead it was the "18R" version.
I can't find the "18T" paint anywhere.
I ended up saying to hell with it and used some automotive paint "GMC 501 Q / Carbon Flash Metallic" that I had used on my Corvette front splitter that was on my garage shelf. I sure as hell wasn't going to buy a can from Color Rite for $40 that may not match anyway.
I haven't mounted it yet as it is drying. I'll post up a pic when I do.
As for touching up (with a brush) any small knicks/scratches, it's anybody's guess as to what color actually works best. Sounds like a trial and error scenario. Of course I'm sure no one would even notice if it were a little off in color since it would be such a small touch up.
As you said, if it were for a large area the only way to go would be to sand, prime and paint the entire piece.
Rook
Joined: 03/28/09
Posts: 20589
RE: Lower Fairing/Frame/Swingarm Paint
03/26/20 1:45 PM
As for touching up (with a brush) any small knicks/scratches, it's anybody's guess as to what color actually works best. Sounds like a trial and error scenario.
Yes but I would say the ColorRight jar color is not the best because it requires a very thin coat to "blend in " with the factory paint. For small touchups, an opaque color that is indiscernible from the factory paint would be the one I would prefer. Trying to watercolor on an engine cover makes little sense to me. I want to apply paint reasonably thick so the resulting color effect is always consistent when it dries. It's easy to apply paint as it normally flows out of the brush. Having to reduce the paint to achieve the proper color takes some experience. I suspect the frame color on the ZX-14 might have even changed since the 06-07 models. As I mentioned the 06 clutch cover I bought was a lot darker than my 08 clutch cover. If you look at pics of 06-07s the engine covers look blacker than what they went with later on. ColorRight might have gotten the 06-07 engine/frame color right and left it at that.  One thing is for sure, the jar color I have is too black when you apply it in a normal body color and it hasn't got nearly as much metal flake as the factory paint. I shook this jar up very thoroughly too.
Page: 1
New Post
Please login to post a response.