


Fuel Line Inspection and Removal
The rear fuel hose joint needs to be disconnected to remove the fuel tank and the front fuel hose joint must be disconnected to remove the throttle bodies assembly. The entire fuel line does not normally need to be removed unless it is being replaced.
Take care to not bend the fuel hose severely when handling it or it will get damaged and be unsafe to return to service.
Do First:
Disconnect battery negative ground cable from frame (see Battery Removal, steps 1, 2 and 3).
If disconnecting the fuel hose from the throttle bodies:
Disconnect the air cleaner drain hose (see step 1, Air Cleaner Drain Hose Removal).
Disconnect the Crankcase vent pipe from the air box (see steps 1, CRANKCASE VENT PIPE REMOVAL).
OPTIONAL: Remove Throttle Bodies Assembly (see steps 1 through 9, THROTTLE BODIES ASSEMBLY REMOVAL). It may not be possible to access the fuel hose joint on the throttle bodies assembly unless the throttle bodies assembly is removed.
Removal
1. Set the back of the fuel tank bracket down on its mount and lift the front to almost vertical. Locate fuel line joint.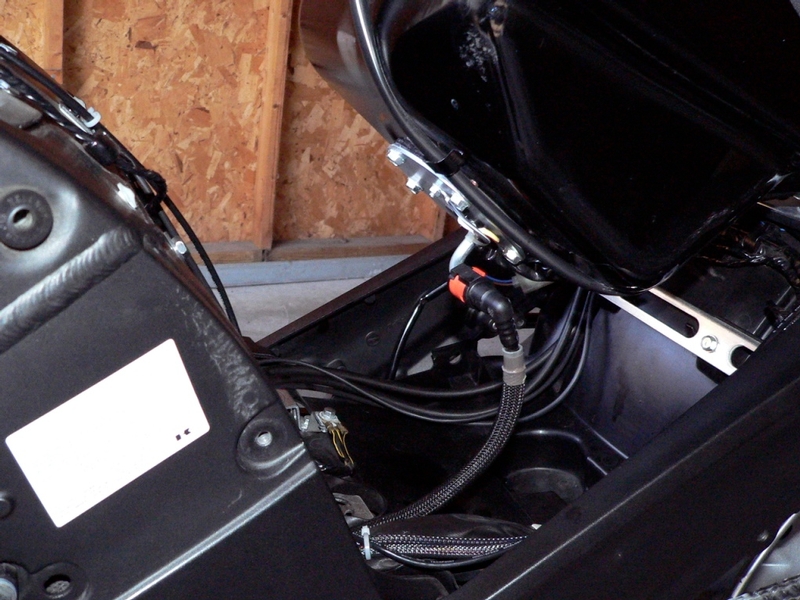
2. Place a towel in the mud flap below the fuel tank to catch fuel leakage.
Press the two orange lock claws inward and up while pushing the fuel hose joint toward the delivery pipe to unlock the fuel line joint.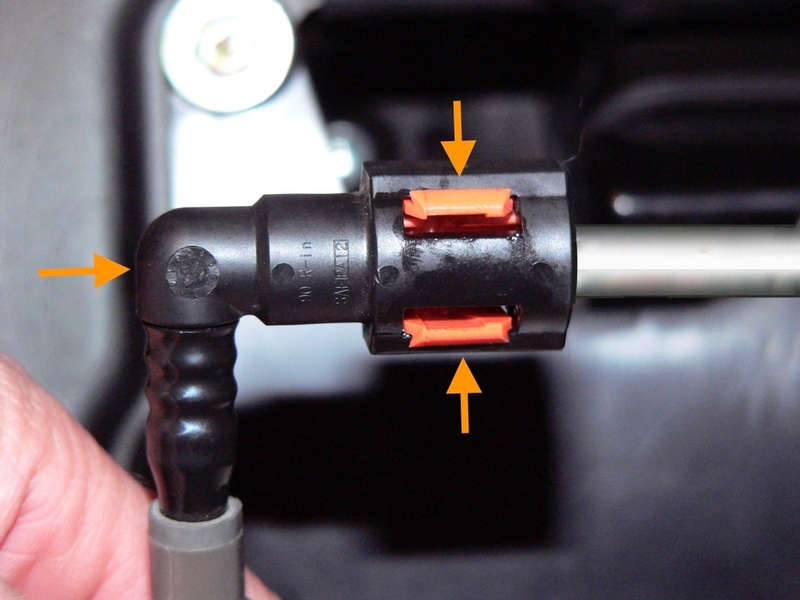
The fuel line joint lock will protrude from the other side, releasing its hold on the delivery pipe. 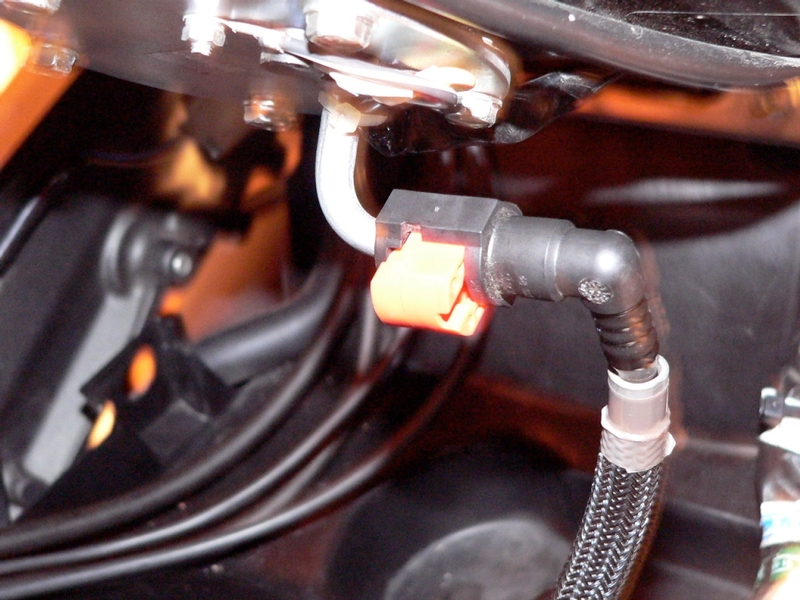
3. Pull the fuel line fitting off of the delivery pipe. A small amount of fuel will run out of the fuel line.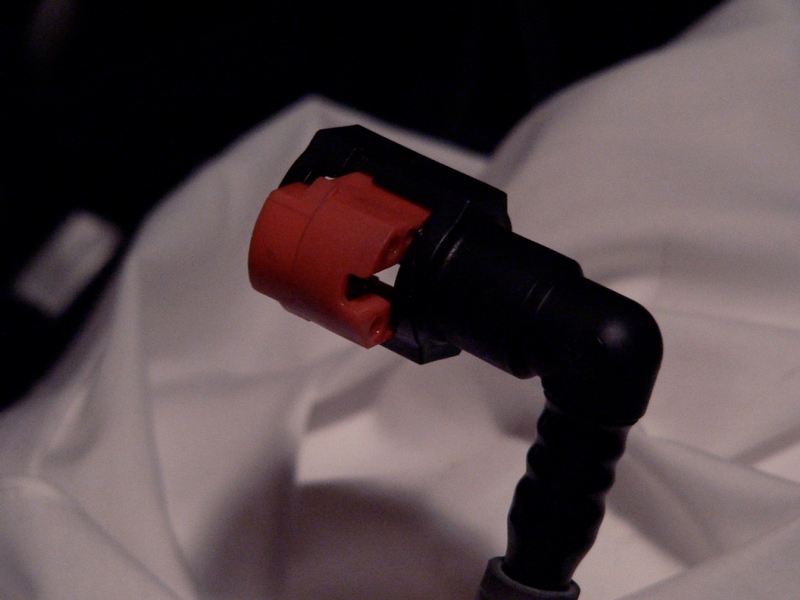
4. Press the lock claws and fuel hose joint as described in steps 1 and 2 of this tutorial to unlock the fuel hose joint from the fuel rail delivery pipe. 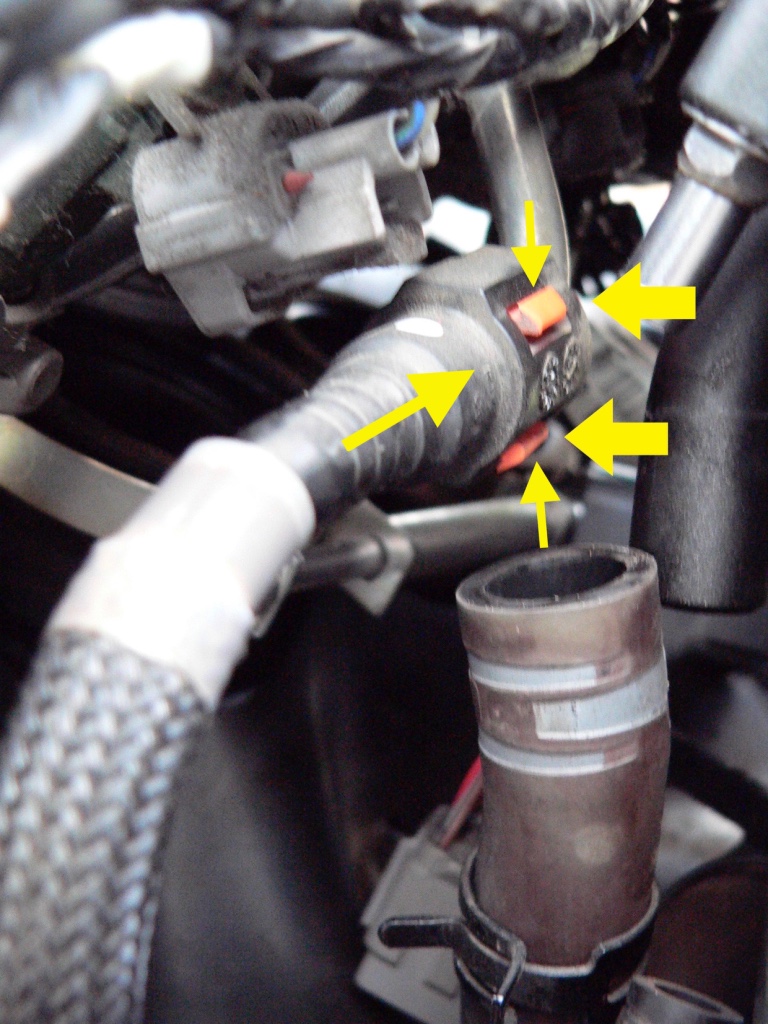
A few ml of fuel will spill out.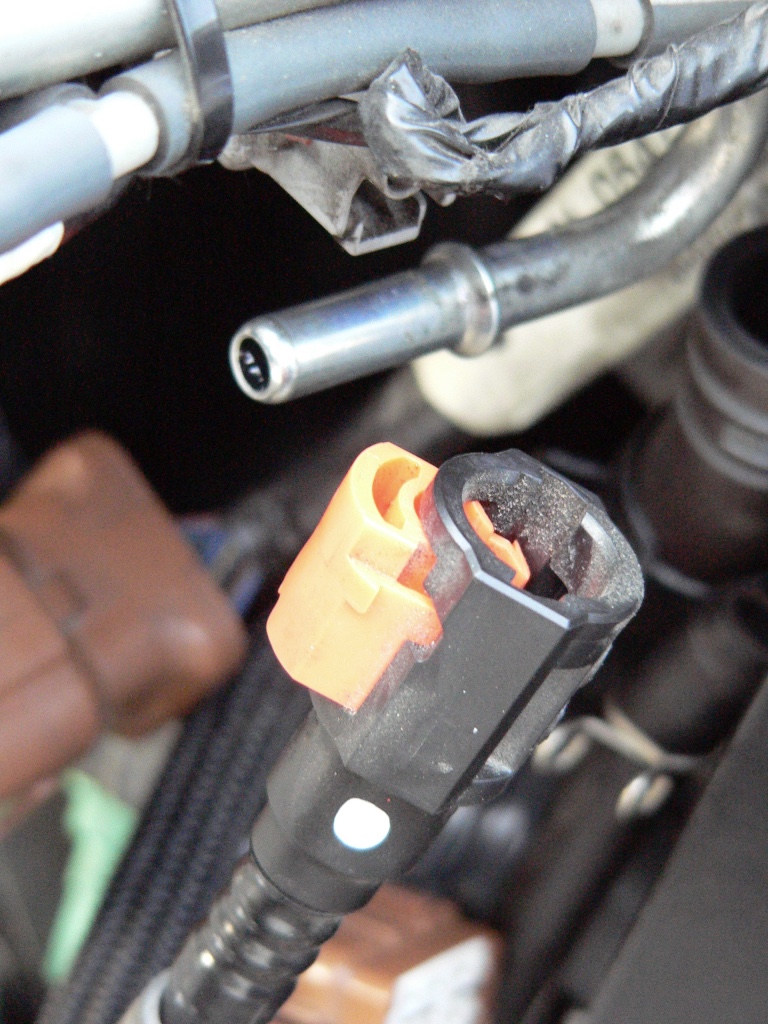
5. Note the routing of the fuel hose before removing it.
Pull the fuel hose forward from the engine compartment guiding the fuel pump fuel hose joint through the frame.
Inspection
6. Replace the fuel hose if any fraying, cracks or bulges are found or if it has been sharply bent or kinked.
Installation
The fuel hose joint with the white mark connects to the fuel rail delivery pipe on the throttle bodies. The elbow fuel hose joint connects to the fuel pump delivery pipe under the fuel tank.
7. Guide the fuel hose from the engine compartment, over the rear engine mount and into the fuel tank compartment. Make sure that the fuel hose will rout behind the hoses as shown in the pic below. 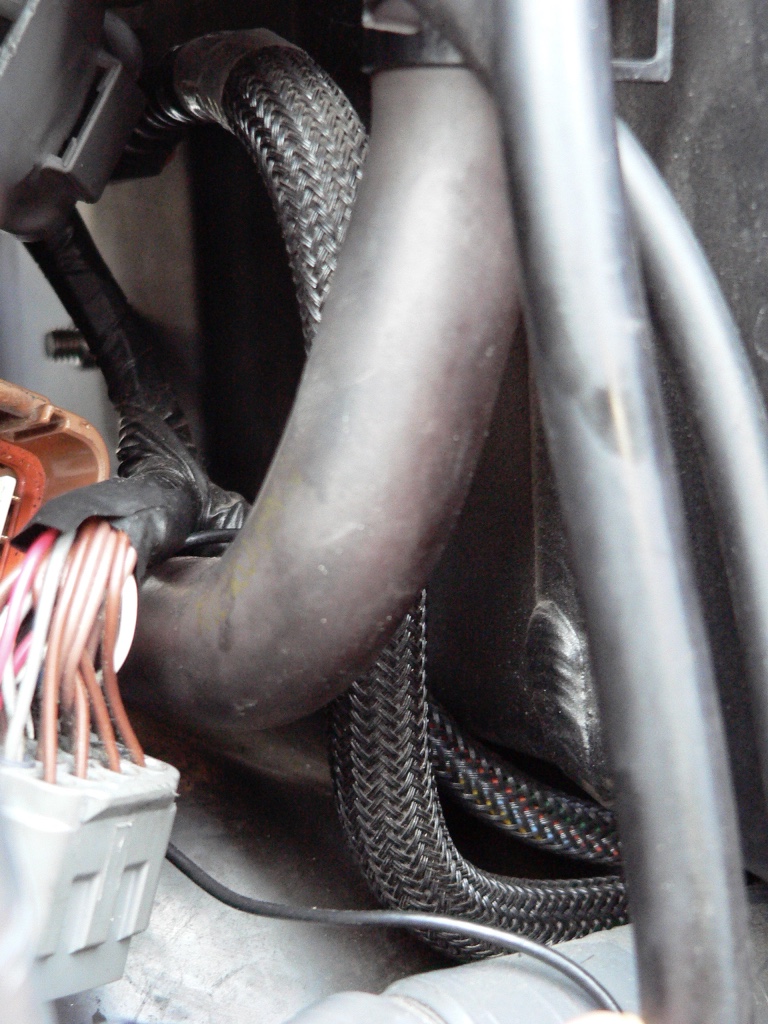
8. Connect the fuel hose joint to the delivery pipe on the fuel rail by pushing it onto the pipe until it clicks.
Press the orange button on the fuel hose joint until it clicks.
Push and pull the fuel line joint back and forth on the the fuel delivery pipe more than twice to verify that it will not come off under high pressure operating conditions.
If the joint comes off, reinstall it.
The fuel line joint should slide back and forth with ~5mm of play when the joint is locked onto fuel delivery pipe.
9. Make certain the fuel line is routed properly in the fuel tank compartment.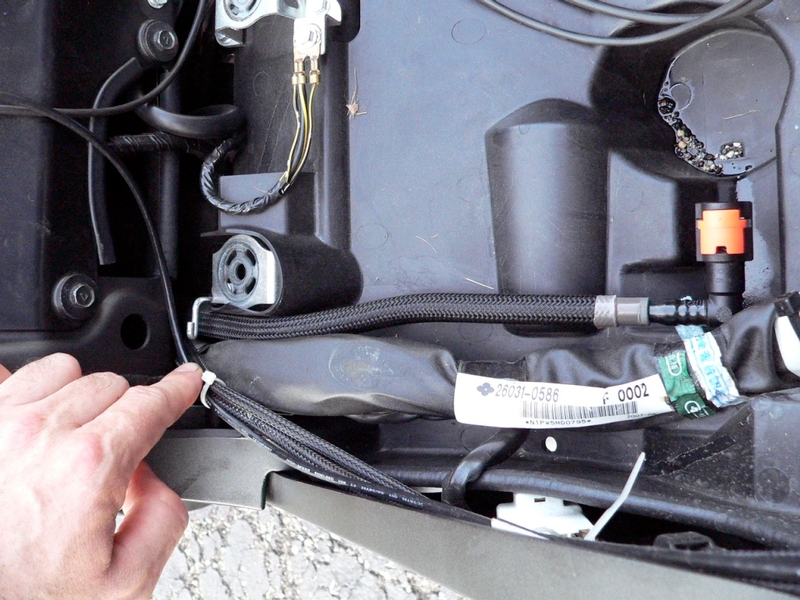
Place the back of the fuel tank on the rear fuel tank bracket and lift the front of the tank to a nearly vertical position.
Follow the steps as described in step 8 above to install the fuel hose joint to the delivery pipe on the fuel pump.
If removed, install throttle bodies assembly (THROTTLE BODIES ASSEMBLY, steps 10 through 15).
If disconnected, install crankcase vent pipe (see CRANKCASE VENT PIPE REMOVAL, step 3).
If disconnected, install air cleaner drain hose (see AIR CLEANER DRAIN HOSE REMOVAL, step 3).
Install fuel tank (see Fuel Tank Removal, steps 8 through 10).
Connect battery negative ground cable from frame (see Battery Removal, steps 1, 2 and 3).
Fill the fuel tank with gas. Inspect for leakage from the fuel line joints with the engine off and then again with the engine running. If any fuel leaks, shut the motor off immediately and determine the source of the leak.
If there are no leaks, test ride checking carefully for any sign of fuel leakage.
* Last updated by: Rook on 12/23/2017 @ 6:28 PM *