


Gen1 Clutch Cover Removal
The clutch cover will need to be removed to do a closer inspection of the clutch, to remove and replace the clutch plates or to disassemble the entire clutch. The oil pump and the end of the external shift mechanism is also located within the clutch compartment.
If you must leave your clutch project for any length of time, put the clutch cover back on and fasten it with a few of the screws threaded finger tight.
There is no need to wipe any oil out of the inside of the clutch cover, clutch basket, pressure plate or inside of engine case. These parts will all be coated with oil again and wiping could introduce large fibers. It seems unlikely that debris contaminating this area could enter the oil galleries but it would obstruct oil flow through the oil pan pickup screen.
OEM clutch cover gaskets are made of a very thin soft material that usually sticks almost entirely to the clutch cover. The service manual recommends replacing the clutch cover gasket. If an OEM gasket has no cracks, is adhered to the clutch cover and is otherwise in good condition, you can reuse it at least one time.
Do First:
Remove the RH Lower Fairing (see Gen1 Fairing Removal).
Thoroughly wash the entire RH side and top of the motor with soap and water to eliminate all debris and dust.
Do not run the motor before draining oil. Drain all engine oil cold (see Engine Oil and Oil Filter Change, steps 1 and 5) or drain enough oil so that it will not pour out when the clutch cover is removed. Removing the oil filter is not necessary.
Tools
toothbrush
oil drain pan
8 mm socket
Sharpie marker
2 clean plastic bags
flashlight
plastic scraper
rag soaked in mineral spirits
water faucet
compressed air
optional: new OEM gasket or new aftermarket fiber gasket
optional: Three Bond 1194
Three Bond 1211 Silicone Liquid Gasket
non permanent thread locking agent
5 mm allen wrench
torque wrench and 5mm allen key socket
Removal
1. Use a toothbrush to remove tiny bits of gravel that may remain around the edge of the clutch cover. There is a tight corner that debris hides in above screw #3.
Place an oil drain pan under the clutch cover. A small amount of oil will drain out when the cover is removed.
Break all 11 clutch cover screws free with an 8 mm socket. Remove the screws.
Give the cover a light test pull. It will usually remain stuck to the engine case by the gasket and engine sealant.
The clutch cover screws are all identical. I like to put the same screws back in the same holes so I numbered the screw heads with a Sharpie before removing them. The three white dots mark the locations of puller tabs.
2. Although it is pretty unlikely a puller device will be needed to remove the clutch cover, you may not be able to safely pull it off with your fingers. Use the toothbrush handle or some other plastic tool to pry forward behind a puller tab.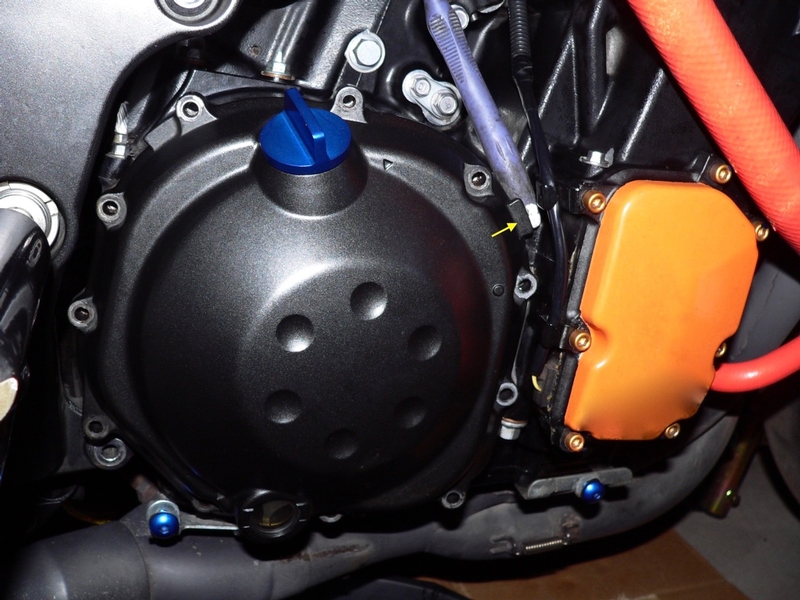
The location shown by the arrow in the picture above worked well for levering between the rounded back corner of the upper engine case and the forward puller tab on the clutch cover. Be careful to keep a hand on the cover so it does not fall off.
3. Once the clutch cover has been loosened in one spot, it should pull off easily by grasping the puller tabs with your finger tips. A little oil will run out.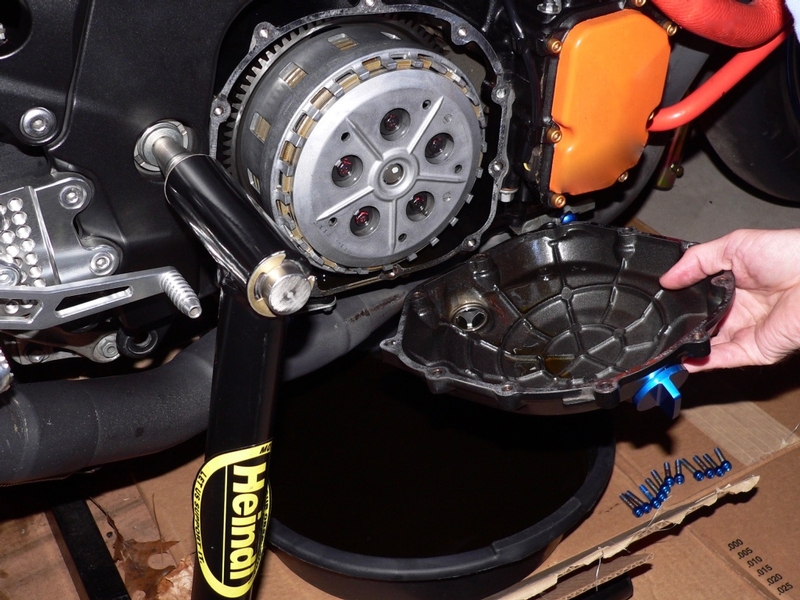
Place the clutch cover in a clean plastic bag and set it aside.
Shut off the shop lights and use a flashlight to inspect for any debris that might have fallen into the engine case. Remove any debris with your finger tip.
Installation
4. I probably could have reused this gasket but since it has a few spots missing and was on a used cover, I decided to replace it. 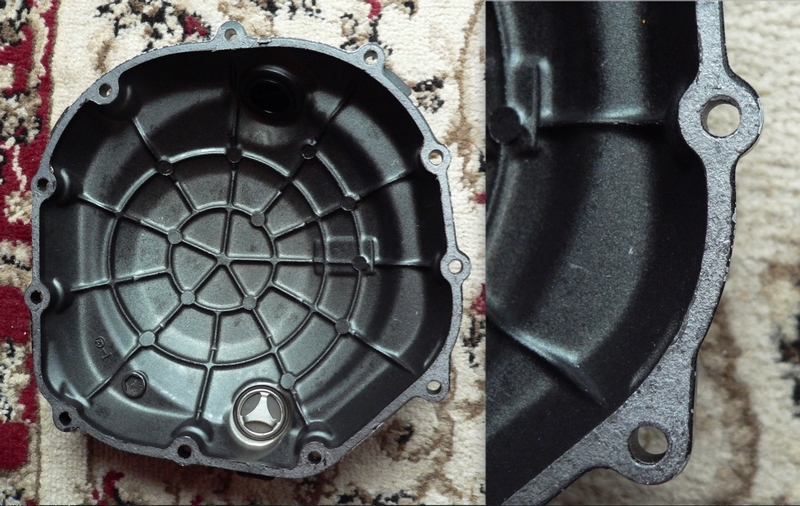
Removing an OEM gasket is pretty labor intensive for such a simple procedure. Scrape the old gasket off with a plastic scraper, only. DO not use a metal tool or a razor blade. The surface the gasket is adhered to is painted and chipping the paint or gouging the machined surface could make the cover leak even with a new gasket. Use your fingernail to scrape around the boltholes. You will not be able to scrape clear through the gasket but take all of the top soft layer off.
Scrape any engine sealant off of the inside edge off the clutch cover with your fingernail.
After the gasket has been mostly eliminated, remove the remaining film with a rag soaked in mineral spirits. It takes a lot of rubbing but some areas (especially around the boltholes) flake off easily. Take most of the film off. I don’t think there should be any problem if you still see some silvery staining where the gasket was.
After the gasket is removed, rinse the inside of the cover under a water faucet to eliminate all debris. Blow it dry with compressed air. 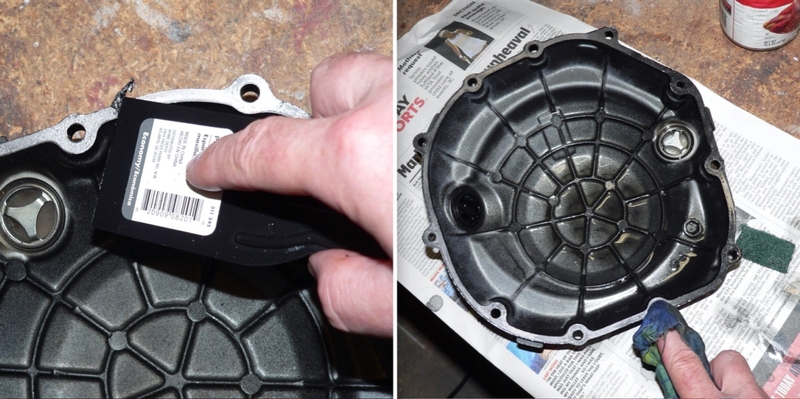
5. If you are reusing an OEM gasket, I would leave the gasket material on the gasket surface of the clutch case to fill in where it separated from the main part of the gasket on the cover.
Whether reusing a gasket or replacing it, you should remove any loose silicone sealant from the inside edge of the clutch case. Do not remove engine sealant that is securely adhered to the inside of the clutch case.
Place a plastic bag over the clutch basket and spring plate to catch fallen debris. Use a plastic scraper and minerals spirits on a rag to remove the gasket material. 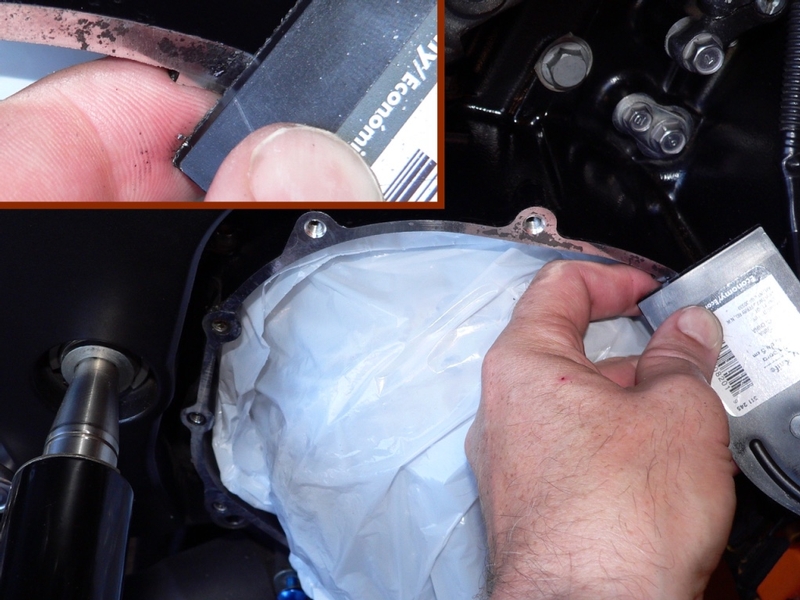
Tuck the plastic bag inside the clutch case so gasket particles will be pulled out with it when it is removed. You will definitely drop some pieces of gasket on the plastic. Try to catch as much of the fallen gasket material as possible on your finger as shown in the picture above. The gasket material will come off of the smooth edge of the clutch case much easier than it did from the clutch cover.
6. When the gasket surface of the clutch case is perfectly clean, pull the plastic bag straight out. wipe your finger all along the inside edge of the clutch case to eliminate any gasket particles that are clinging there.
If you are installing a new OEM gasket, you will need to figure that out on your own. It seems like an OEM gasket would be very delicate and easily damaged during installation. One person advised that I apply Three Bond 1194 with a paintbrush to the side of the gasket that adjoins the clutch cover so that the gasket would become glued to the clutch cover. Then, apply a nickel based anti seizing agent to the side of the gasket that adjoins the gasket surface of the clutch case. This will ensure that the gasket is positioned properly before installation and will stick only to the clutch cover the next time the clutch cover is removed. Three Bond 1194 is semi-hardening so it can be removed if the gasket ever needs to be replaced. I may try this approach the next time I remove the clutch cover but if I used the anti seizing agent, I would apply it very thin with my finger. It seems like an engine contamination risk.
When reusing an OEM gasket or installing a new one, apply Three Bond 1211 Silicone Liquid Gasket to the gasket surface of the clutch case where the seams are (the areas marked by blue circles in the photo below). Try to apply the sealant away from the inside edges so that it will not get squeezed to the interior of the clutch case when the cover is installed.
Sealant - Liquid Gasket, TB 1211F: Kawasaki part number 92104-0004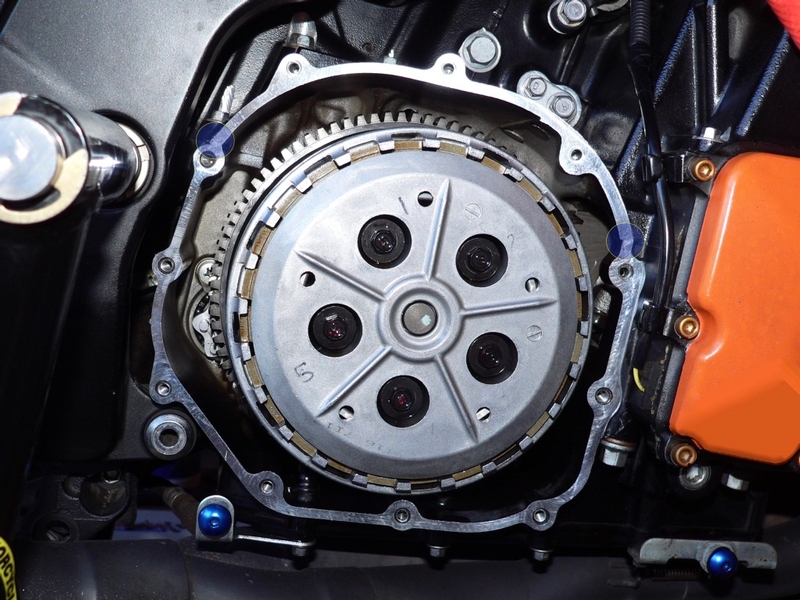
It is not necessary to use sealant on the engine case seams if you use an aftermarket fiber gasket.
To install an aftermarket fiber gasket, place the gasket over the gasket surface of the clutch cover and position it using the top clutch cover screw. 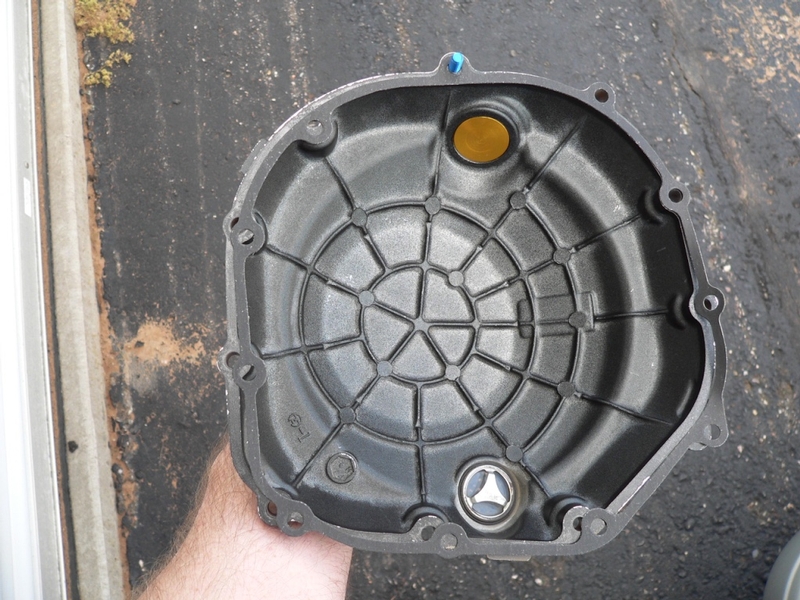
Hold the gasket in place between the gasket surface of the clutch cover and case while you install each screw finger tight. I do not think it would be possible to install an OEM clutch cover gasket this easily.
7. The service manual recommends applying non permanent thread locking agent to clutch cover bolt #3 (see #3 in the photo on step 1). If it still has the old thread locking agent on it, that should stop up any oil seepage but if it does not, you could always remove the bolt and apply more.
Tighten the clutch cover bolts evenly with a 5 mm allen wrench. Torque them with a torque wrench and 5mm allen key socket.
Torque - Clutch Cover Bolts: 9.8 Nm (1.0 kgfm, 87 in lb)
I use about 55 in lbs of torque on my clutch cover bolts. They do not come loose and the clutch cover has never leaked.
8. Add engine oil (see Engine Oil and Filter Change steps 5, 6 and 7) until the oil level is at the top mark (1 gallon if you drained the whole oil pan but did not remove the filter).
Check for clutch cover leaks before during and after the engine has run.
* Last updated by: Rook on 8/1/2017 @ 5:30 PM *