


Why Vortex?
Clearance.
From the research I had done before purchasing rearsets, it appeared to me that Vortex Rearsets would have the greatest range of adjustment for the ZX-14 compared to other well known brands. I was skeptical about rearsets that did not list the range of adjustment in their promotional material. It is difficult to compare the actual clearance of one footpeg to another. The height and rearward adjustment are only a part of what gives improved clearance with a footpeg.
As shown in the pictures below, the point of contact at the tip of the OEM foot peg is 1/4" lower than the Vortex pegs raised to maximum height. The 1/4 inch vertical difference would not be as meaningful with the bike leaned over in a corner. Also, the outer point of the OEM footpeg is beveled to increase clearance. More importantly the OEM pegs are hinged to allow them to flex if the peg ever does touch down. After market rearsets do not offer either safety measure. Assuming the scraper pin was removed and the bung ground away, the Vortex pegs do not seem to provide any clearance advantage where peg height is concerned. 

The measurements for the above photos were taken with the bike leveled front to back on Pit Bull front and rear stands. The bike was vertical rather than leaned over a sit would in a corner. To attempt to get an idea of the clearance difference with the bike leaned over, I measured from a line on the floor that represented the bike's center line to the tip of the OEM and Vortex pegs. The bike was still on the stands. It appears that the OEM pegs, with there beveled point actually offer about 1/2" more clearance(if the scraper peg screw bung was ground off). However, this does not take into consideration the distance the pegs protrude from the bike. The OEM peg is longer and sticks out to the side more than the Vortex. This also causes the measurement from the motorcycle's centerline to the tip of the peg to be longer. The longer measurement reflects a longer foot peg and does not necessarily equate to greater clearance.


The distance that the pegs protrude laterally is perhaps more of a factor in cornering clearance than height. In the photos below, the steal rule is used as a perpendicular guide to cross reference to the tape measure. I am measuring the distance from the rearset mouting bolt to the tip of the peg. The Votex peg protrudes an entire inch and one sixteenth less than the OEM peg.


It is difficult to determine whether the increased clearance of the Vortex peg or the articulating action of the OEM peg would be most effective in preventing a crash due to dragging a peg. If the Vortex touches, it is not going to flex at all however it may act as a slider helping to reduce damage to the bike in a crash. I have dragged my exhaust but never touched a peg on the 14. I believe Vortex pegs, when adjusted all the way back and up would provide more clearance than the bike is capable of using at maximum lean.
Furthermore, a grinder could be used to bevel the ends of the Votexs to improve clearance like the OEM pegs. In fact, being made of aluminum, the Vortex pegs could easily be cut shorter to protrude even less.
Weight
The OEM pegs are actually a few ounces ounces lighter than Vortex pegs. The photos below show the OEM foot peg assemblies and the Vortex assemblies with pressure valve switch necessary for rear brake light operation.


Price
Vortex rearsets cost less than other well known brands. Vortex is a popular brand and parts are available if anything should break.
Colors
Vortex Rearsets come in black, gold and clear anodized colors. I have the clear and as you will see in the photos at the end of the tutorial, they are very bright white metal. My chrome chain is noticeably less intense than the rearsets. They really stand out against the dark frame which is what I wanted but it seemed a bit much at first. I like it now. The rearsets are an eyegrabber when viewing the bike. Black is very subtle and gold is a nice in between. I have seen photos of all 3 colors here on the forum.
3 Gripes with Vortex rearsets
I was not happy with was the missing hardware in the Vortex kit. They did not include new bolts to mount the adjuster blocks to the frame. They also did not include new bolts to mount the rear brake master cylinder to the heel guard. In both cases, I was able to use the OEM bolts in place of the bolts that should have been included with the Vortex’s. One locknut for the gear shift linkage rod was also not included and it is a very hard to find metric reverse thread nut.
The longer linkage rod that was included with the kit did not thread into the adjuster turn buckle smoothly which made adjusting the lever height difficult. The threads became so tight that the locknut was not needed.
I have been advised by forum members that the missing hardware would be provided by Vortex for free if you enquire. Also, it does not seem like anyone else I had recently communicated with on the forum had a problem with the gear shift linkage rod. Perhaps mine was one that was not machined properly. I am almost certain I remember reading some other owner post about the same problem years ago. It may be the just the long linkage rods that fit poorly. The short rod threaded in smoothly on both ends. In any case, the entire kit worked as it should by reusing a few OEM bolts and some extra fiddling with the long linkage rod. Vortex should at least include the few bolts and reverse thread nut in the kit since they seem to have them on hand if you ask for them.
As can be seen in the photo of step 15, the right Vortex heel guard slightly compresses the pipe that comes down from the rear brake fluid reservoir against the OEM brake line. I operated the bike like this for some time and noticed no problem with braking performance but it seemed wrong to have such tight contact between rubber and metal parts. I replaced the OEM rear brake line with an aftermarket line and turned the coupling which attaches to the rear master cylinder slightly to the inside. This totally removed the problem. It would be possible to do the same with the OEM line but the metal nub on the coupling would need to be realigned into the side notch rather than the front. If this caused the brake line to be routed unsafely, it would also be possible to cut off the nub so that the coupling could be reattached and turned slightly as I did with my aftermarket line installation.
Tools
pliers
6mm hex tool
steel galvenized wire
heavy weight high temperature grease
non permanent thread locking agent
drip pan
water bucket
12mm socket
rag
plastic plug or stopper
rear brake light pressure switch
new cotter pin
torque wrench
zip tie
self adhesive zip tie mounting plate
10mm socket and 3 inch extension
14mm socket
Anti-seize agent
10mm box end wrernch
10mm open end wrench
OEM rearsets, pegs and pedals removal
1. Straighten and remove cotter pin with a pliers. Remove joint pin from rear brake pedal/master cylinder linkage

2. Use a 6mm hex tool to remove the two bolts that fasten the right hand side heel guard.

3. Remove the seat. Disconnect the leads to the rear brake light switch. The switch is located under the seat to the right rear of the fuel tank. There is a metal tab that retains the the wire to the connector. The tab can easily be unbent to free the wire. A piece of steel galvinized wire may be used to fish the connector leads out from under the back of the tank or you may remove the tank to access the leads. FUEL TANK REMOVAL

4. Use a 6mm hex tool to remove the two bolts that fasten the right OEM rearset to the frame.

5. Pull the entire brake pedal/footpeg/rearset/rear brake light switch from frame.

Vortex Rearsets Assembly and Installation
Brake Side
6. Use a heavy weight high temperature grease to lube bearings in brake pedal.

Place thin metal gasket on foot peg.

8. Snap brake pedal onto the foot peg, against the thin metal gasket as shown (make sure brake pedal is not on backwards).

Place other thin metal gasket against opposite side of the brake lever bearings.

10. Apply non permanent thread locking agent to the threads of the long button head
bolt. Align the slots of the heel guard plate with the splines of the foot peg and place the parts together. Use 6mm hex tool to tighten the long button head bolt through back of heal guard plate and into foot peg.

11. Use OEM rearset bolts to fasten Vortex rearset adjuster plate to the right hand side of the frame. Use a 6mm hex tool and torque wrench to tighten the bolts to OEM spec which is 18 foot lbs. I did not use thread locking agent on these bolts.

12. Apply non-permanent locking agent to the two short 6mm bolts. Place brake pedal/foot peg assy to rearset adjuster plate at desired position. Tighten bolts to snug using a 6mm hex tool.

13. Fasten master cylinder to heel guard using short bolts and a 6mm hex tool. I used the OEM bolts because new ones were not supplied with my kit.

14. If you do not wish to retain rear brake light functioning skip steps 14, 15 and 16. Proceed directly to step 17. If you will be using a pressure valve to retain rear brake light function, place a drip pan under the rear master cylinder brake line coupling. Have a water bucket prepared in case any brake fluid splashes or drips on painted surfaces.

15. Remove the banjo bolt, gaskets and ring coupling from rear brake master cylinder using a 12mm socket.

A rag may be used to catch brake fluid as it seeps down from reservoir. The brake fluid will drain from the rear brake fluid reservoir but the rear brake master cylinder will remain full of fluid. A plastic plug or stopper may be placed in the ring coupling to prevent fluid from running out of the reservoir above.

Banjo bolt, gasket and ring coupling arrangement order. The same arrangement is used for reconnecting the line using a pressure switch in place of the banjo bolt.

This photo shows a pressure switch which will be installed in the rear brake line to take the place of the OEM mechanical rear brake light switch.

16. Properly arrange gaskets and rear brake pressure switch in ring coupling. The pressure switch will take the place of the banjo bolt. Thread the pressure switch finger tight into hole in top of rear brake master cylinder.
The photo shows an after market line installed in place of the OEM line.

17. Use a 6mm hex tool and torque wrench to tighten the master cylinder to the heel guard 18 foot lbs.

18. Bleed entire rear brake system
19. Lubricate link pin with heavy weight high temp grease. Place link pin back into master cylinder linkage and through the adjoining hole in the rear brake pedal.
Test the rear brake pedal for proper height. Adjust the height by loosening the lock nut and moving the adjuster nut on the master cylinder push rod. Tighten the lock nut on the push rod when the brake pedal height is properly adjusted. I placed my right foot peg at the maximum height and farthest back position. There was no adjustment to brake pedal height required.
Insert a new cotter pin into the hole in the link pin. Use a pliers and screwdriver to bend
the ends of the cotter pin over so that link pin can do full rotation within the holes of the linkage.

20. Connect rear brake light leads and attach to frame with a zip tie and self adhesive zip tie mounting plate. Reinstall the seat and fuel tank. Pump brake to ensure the system is pressurized before riding the motorcycle.

Gear Shift Side
21. Use a 6mm hex tool to remove the two bolts that fasten the OEM rearset to the
frame.

22. Use a 10mm socket and 3 inch extension to remove the bolt that secures the OEM
shift lever to the shift shaft. Carefully slide the lever off of the splined end of the shaft.

23. Place the thin metal gasket on the inside of the peg as shown. Apply nonpermanent thread locking agent to the threads. Align the two teeth on the inside of the peg with the holes in the heel guard. Use a 6mm hex tool to tighten the button head bolt included with the kit through the heel guard and into the peg.

24. Apply grease to the shift lever bearings and the pushrod joint.

25. Place the bottom screw into the heel guard as shown then proceed to step 26 to attach the shift lever. (There is not enough clearance between the shift lever and the countersink if the shift lever is attached first.)

The bottom screw must be placed in the assembly before the shift lever. The shift lever overlaps the bottom screw slightly.

26. Place the star head bolt through the shift lever and put the stainless steal washer included in the kit over the threads so that the washer will be situated between the shift lever and the heel guard.

27. Apply nonpermanent thread locking agent to the threads of the star headed bolt. Use a 14mm socket to tighten the bolt.

28. As was done on the brake side of the bike, use a 6mm hex tool to fasten the Vortex rearset adjuster plate with the OEM rearset bolts. Use a 6mm hex tool and torque wrench to tighten the bolts to 18 foot lbs. I did not use thread locking agent on these bolts.

29. Apply non permanent thread locking agent and use a 6mm hex tool to attach the shift pedal assembly to the adjuster plate at the desired position.

30. Apply anti-seize agent to the splines of the shift shaft and push the Vortex shift shaft bracket onto the shaft.

31. Apply non-permanent locking agent and use a 10mm wrench to tighten the OEM shift lever bolt into the shift shaft bracket.

32. Determine whether you wish to use the longer shift rod or the short. Thread the nut included with the kit onto the front threads of the shift rod. The rod will thread into both of the joints at the same time because the shift lever joint has reverse threads. To adjust the height of the pedal, the shift rod may be lengthened or shortened by threading it in or out of the joints.
The long rod that was included with my kit did not thread smoothly and it was not possible to adjust by turning it between the joints. I removed the shift shaft bracket and reposition it one spline forward to fine tune the height adjustment of the shift pedal.

33. Use a 10mm open end wrench to tighten the lock nut on the shift shaft joint to lock
the push rod length adjustment. There should be a similar lock nut with reversed threads tightened against the gear shift pedal knuckle joint.

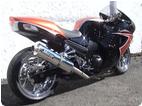
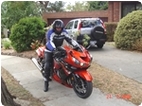
Some Shots of Installed Rearsets


* Last updated by: Rook on 5/11/2015 @ 11:57 AM *