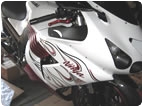
I installed a couple items on my 14R over the weekend, a Stebel Compact horn, and a set of GSG Mototech frame sliders.
My thanks to Privateer for some ideas about the horn install. He told me that separation of the horn plastic bell housing (it makes the noise), from the metal compressor could be done without breaking the horn bell. Once separated, they're reconnected via a piece of fuel line hose.
I'm including some instructions and pictures of both (GSG sliders in another thread, soon).
This is the first time I've had the fairings off. I did have to examine the service manual a couple times to make progress getting them off. The things that stopped me were the hidden tabs, and the hidden rubber mounts for the fairing bits. Other than that, a pretty smooth de-fairing took me about 90 minutes. Getting the gas tank fairing back on was not so good. I broke one of the hidden rubber mount tabs from the gas tank fairing while attempting to force it into final alignment. I smacked the fairing with my fist, not too hard, but enough to break off the tab since it was not aligned up correctly. Oh well. I'll try binary epoxy glue to fix the rubber mount back onto the fairing, next time I have it off. For now, the fairing is still held in place by a substantial metal screw.
So, the Stebel horn. The Compact model is the one you want to buy. The prep and install took me about 8 hours all in. The horn bell prep, fitting and mounting, and the compressor fitting and wiring, and then the air hose routing from compressor to bell took alot of time to figure it all out. I'm gonna also add that I now have a horn that is freeway / highway compatible. I thumbed it this morning, and it would be distinctly audible (LOUD) to the clueless cagers around me. It works...
You really gotta want to have a loud horn to do this mod. Even without the lift from these instructions, the disconnect of the bell without breaking it, and the prep for the air hose will make this at least a 4-5 hour job. At least... Include a couple of runs to the auto parts store, Pep Boys was my one stop shop...
You'll need these extra bits: 3 ft. of fuel / vacuum hose. A 90 deg. "elbow" plastic vacuum hose adaptor (I had to make one). 2 ea. hose clamps. Various zip-ties in lengths from 18" to 5". Binary Epoxy (5-30 min. variety). 7 ft. of hookup wire, red and black, each in 12-14 gauge, stranded wire (not solid). A suitable fuse and fuse holder. (I popped a 7.5 and a 10 A fuse trying to get the fuse size right, and I recommend a 20-25 A fuse. They popped just by thumbing the horn on/ off, not from any electrical miswiring.) Extra hookup wire if the existing horn needs to be retained and used (use both horns together, I did). An assortment of electrical male and female "blade" connectors, for use on the relay, compressor, and existing horn wiring.
The plastic bell is dismounted from the compressor with care. Hold a metal flat (1x3, some left over from some scrap bin) next to the air socket on the compressor, hold a large nail-set on top of that as close as you can get to the junction, and smack it firmly with a nail hammer. You're hitting the plastic as close as you can get next to the top of the plastic support, and directly next to the air outlet junction. Use the metal flat to spread the force over a larger area of plastic. It took me about 6 times for it to separate. It's held together with a dab of gorilla glue on the base-to-compressor "wrap", not at the air outlet junction.
Once separated (Whew, did not break it. Yay!), prep for the air hose. I initially tried a "straight" male-to-male vacuum hose adaptor, glued with plastic cement. Bad move! It does not "set" hard, but flexes too much. Also, the straight pipe causes the air hose to route straight "up" towards the rider when mounting the bell. Also not good... So, I had to make a 90 deg. "elbow" since Pep Boys did not / does not sell one. I bought a "T" part, cut off an arm of it, and epoxyed a vacuum hose cover on the cut-off. Set aside to dry such that the glue does not drain into elbow. (I did say this was a multi-day install, right?) The remaining arm formed the 90 deg. part that I needed, and routes the air hose through the forward fairing horizontally.
Cut off the plastic "C" clamp arms from the bell. You wont need them. A minute's work with a hack saw, they're soft. Do not cut the bell when doing this step (it is possible to do it on that last stroke, when the cut piece falls away...)
Using a big dollop of epoxy, glue the 90 deg. elbow into the bell air inlet opening. Mine fit snugly, perfectly sized out of the box. Use the angle shown in the picture. Otherwise the combination of hose, clamp and zip ties will not clear the steering stop or the lower triple clamp when the steering is turned. Let set upside down, so the glue does not drain into the horn bell air inlet.
Now that glue is dry and set, mount the horn bell such that one bell side is facing the lower triple clamp, left (empty) side. Horn faces down, vertically, sound exiting towards front of cycle. (right side of lower triple clamp hold the front brake line and ABS wiring, it's occupied). The air inlet points to the "right" (driver perspective view when mounted). Use two large (18") zip ties, one on left side of horn bell, one on the right side. Try the steering. The bell, air hose and all should clear just below the lower triple clamp, lock-to-lock.
Now for the coompressor. There's a couple locations possible underneath the Upper forward, left fairing. I finally chose the location shown in the pictures, and hang it from the large electrical harness in there using two zip-ties. The relay is also hung there, from a wire hanging hook.
I put the included plastic air filter interface onto the compressor air inlet, and zip-tied it into place around the compressor. The fairing innards were fairly dirty (my driveway at work), and I did not want dirt to accumulate at the compressor inlet opening directly.
I'm not detailing wiring here. I did need to extend the existing horn button wiring, and existing horn connections, to reach the upper left fairing location. I'll finish by saying I routed, and fused, for a connection directly to the battery. Either you know how to do this by following the wiring diagram that came with the horn (and adapt for the existing horn connection's), or you dont. I'm not willing to take heat for you burning your cycle.)
Install the fuel line (air hose) using a hose clamp to the compressor. It exits down towards the ground from the compressor outlet. Route the hose inside the front fairing, horizontally around to the right of the front fairing, just below the headlights. It looks like it goes from left to right across the bottom of the inside of the front fairing. Now, double it back in a "U-Turn" and connect it to the horn bell air inlet. Try turning the steering. The air hose should wrap smoothly back and forth, horizontally with no binding, with the steering.
Finish the electrical routing. Tighten the air hose clamps (if ya forgot). Insert the fuse. Fire the cycle up and Test the installation.
I noticed about a 1/4 to 1/2 second delay in air horn "loudness" after thumbing the horn button. I attribute this delay to the air hose that is now in-line, in the system. This convinced me to incorporate the existing electrical horn, for some immediacy. It's electrical and so there's pratically no detectable delay in horn noise from it.
Button everything up. Dont break the fairing bits... Enjoy scaring those unsupecting laggards with your new toy!

