


Oil pressure Switch Removal
The oil pressure switch reacts to extremely low oil pressure. It is probably not a reliable indicator of low oil pressure for running the bike at speed. I removed my oil pressure switch to install an oil gauges sensor adapter. Other than that, there is probably no reason to completely remove the oil pressure switch from the boss unless it needs to be replaced.
If you install something brass here even though I think it’s a horrible idea…
How tight to make NPT fittings?
NPT Fittings and how to tighten them
Do First:
OPTIONAL: Drain engine oil (steps 1 and 2 of Engine Oil and Filter Change)
Lift the bike on a rear stand.
Remove Lower Left Fairing (see Lowers, Fairings Removal)
Disconnect the battery negative ground screw (see Battery Removal, step 3)
Tools:
7 mm wrench or a phillips screw driver
rag and some WD-40
drip pan
adjustable wrench or 24 mm socket
piece of microfiber cloth and a 2 mm allen wrench
mineral spirits
flashlight
vacuum pump
small paintbrush
Three Bond 1211 high temperature silicone sealant
high temperature grease
torque wrench
Removal
1. Locate the oil pressure switch at the front of the oil pan to the left of the oil filter. It has a rubber boot on it with a wire coming out.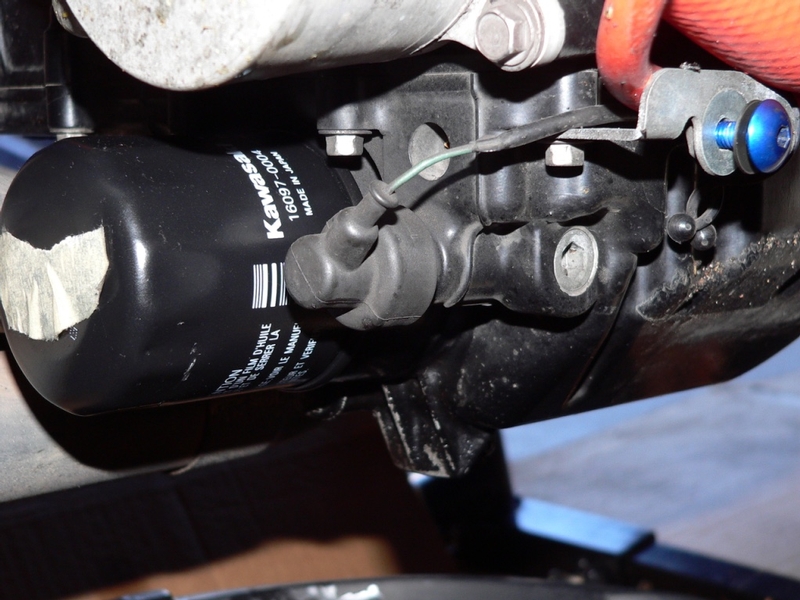
2. Pull the oil pressure switch cover off of the flats on the oil pressure switch. Fold the cover inside out.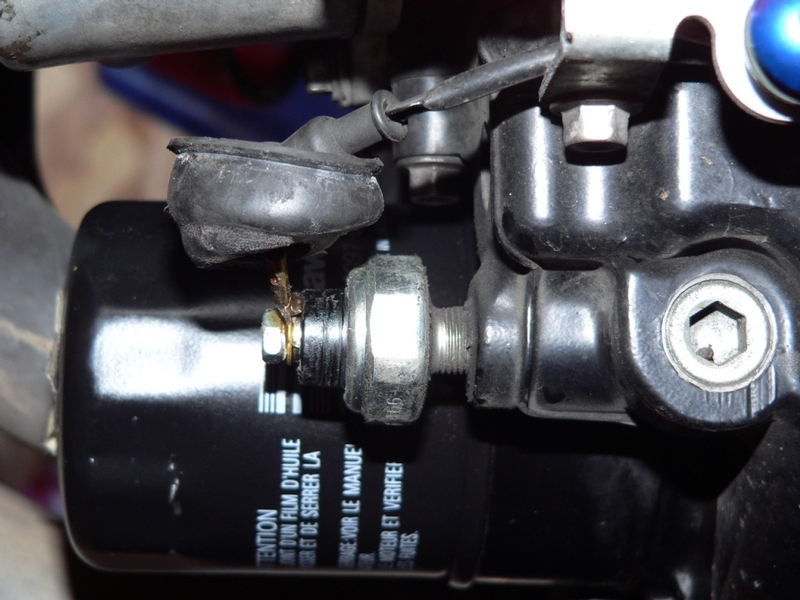
3. Use a 7 mm wrench or a phillips screw driver to remove the oil pressure switch terminal screw. Mine was just snug from the factory installation.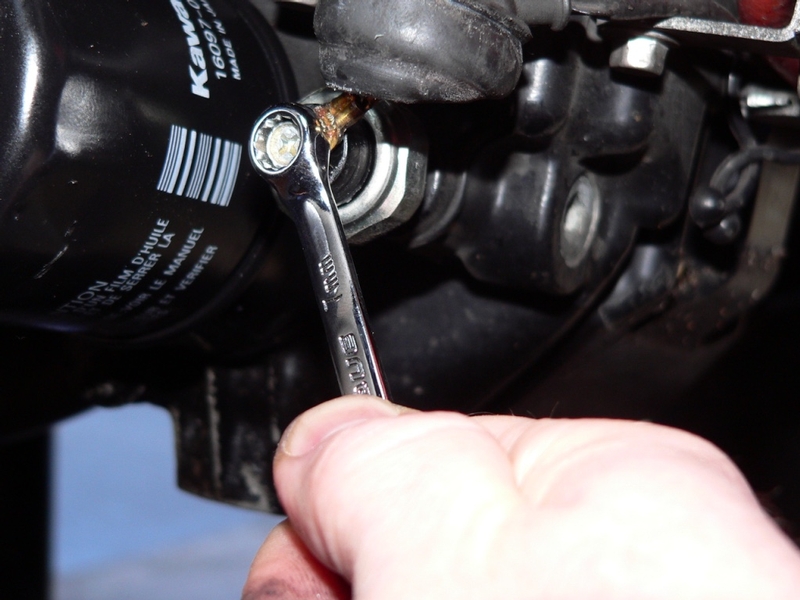
Be careful not to drop the tiny washer.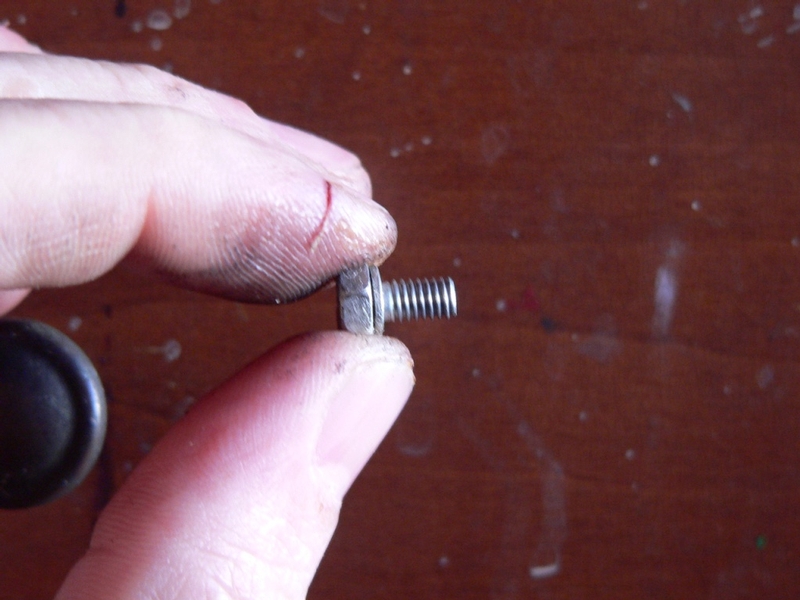
Remove the oil pressure switch terminal wire.
4. Use a rag and some WD-40 to clean grease and dirt off of the threads of the oil pressure switch and the surrounding area.
Position a drip pan below the oil pressure sensor switch.
Use an adjustable wrench to loosen the oil pressure switch. 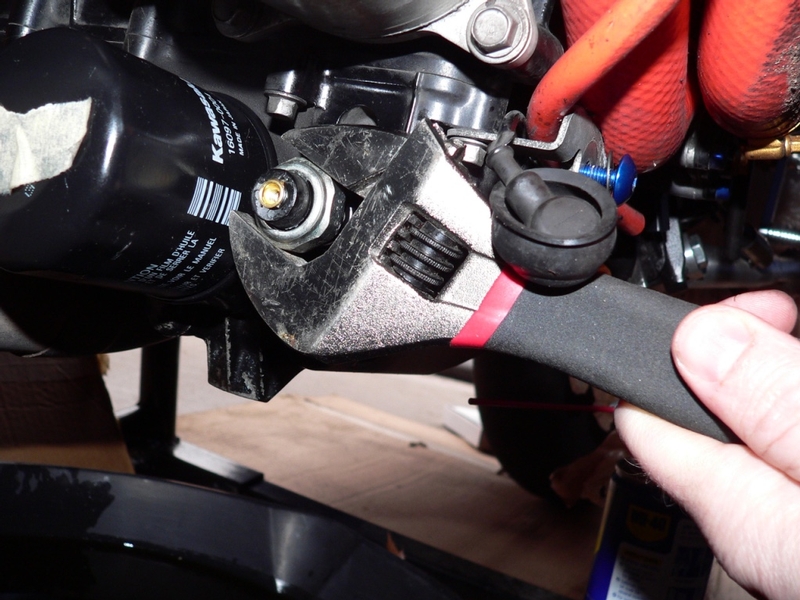
The hex is 24 mm but I suggest using an adjustable wrench to break it free instead of a socket. Like some other pipe fittings, the oil pressure switch flats do not have points so a close fitting, two sided wrench works best.
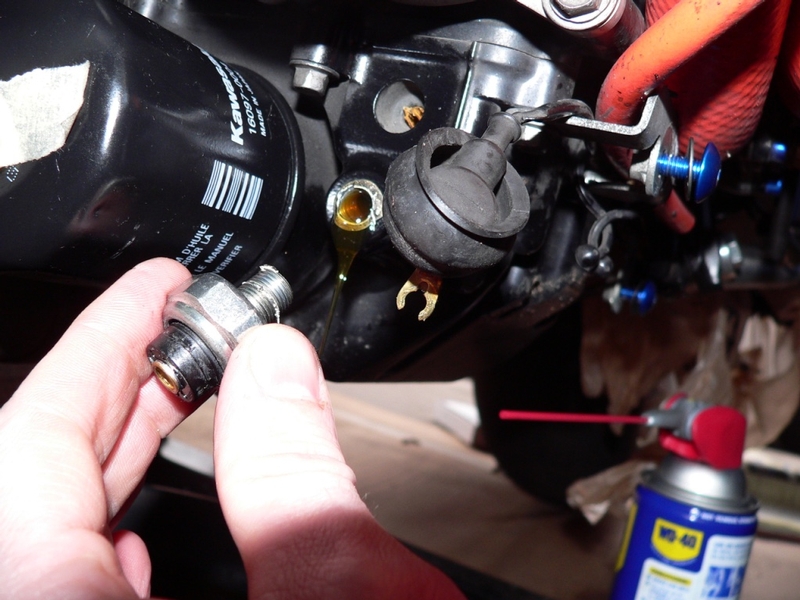
When you thread the oil pressure switch out, there will be some hardened sealant on the threads. Oil will also drain (it will probably shoot out a couple inches if you did not drain the oil) which should expel loose sealant if there is any present in the hole. Do not attempt to stop the hole.
The oil will level off at the height and angle of the oil pressure switch port and continue to collect in the port after most of the oil has drained. I covered the hole loosely with masking tape to prevent any foreign particles from entering while it drained. My bike sat dripping for two months (the warmer weather allowed the oil run out much better) before it drained to the point where oil stopped collecting in the threads.
5. After the oil has thoroughly drained from the oil pressure switch port, raise the front wheel on a stand. This should cause the oil in the cross port (oil pressure test port) to run back so that the oil pressure switch port can be dried out.
Installation
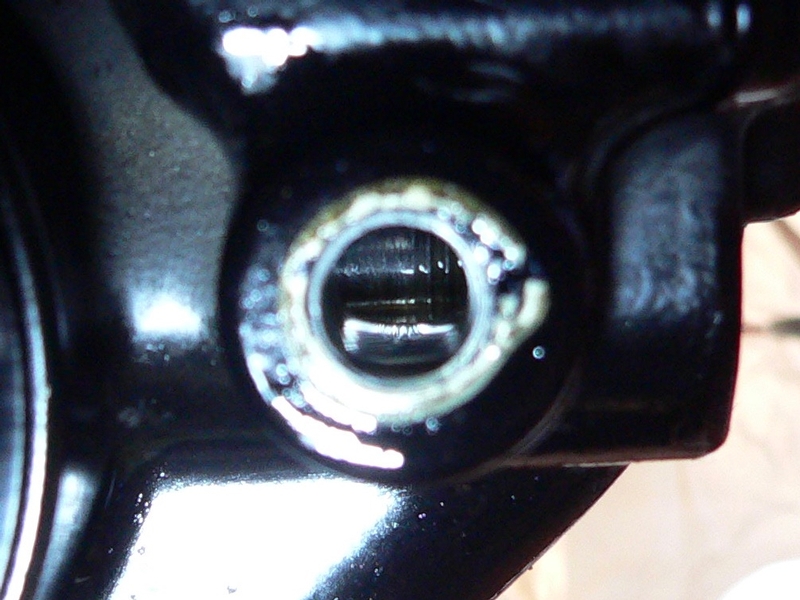
6. Clean loose sealant from the oil pressure switch with a sewing needle. 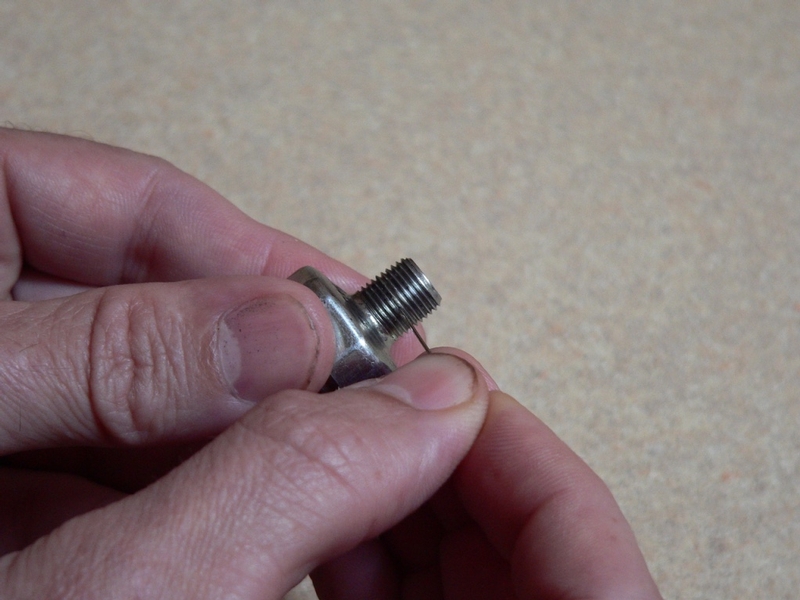
The oil flow from the oil pressure switch travels straight to the crankshaft and top engine. It’s at your discretion if the oil pan should be removed to clean out any traces of sealant that might lodge in oil passages and restrict flow.
7. Wrap a piece of microfiber cloth over the long end of a 2mm allen wrench. Push the tip of the allen wrench to the back of the hole and swab the threads from the inside out by threading the cloth out counterclockwise. Repeat swabbing out the hole two or tree times until the oil is removed.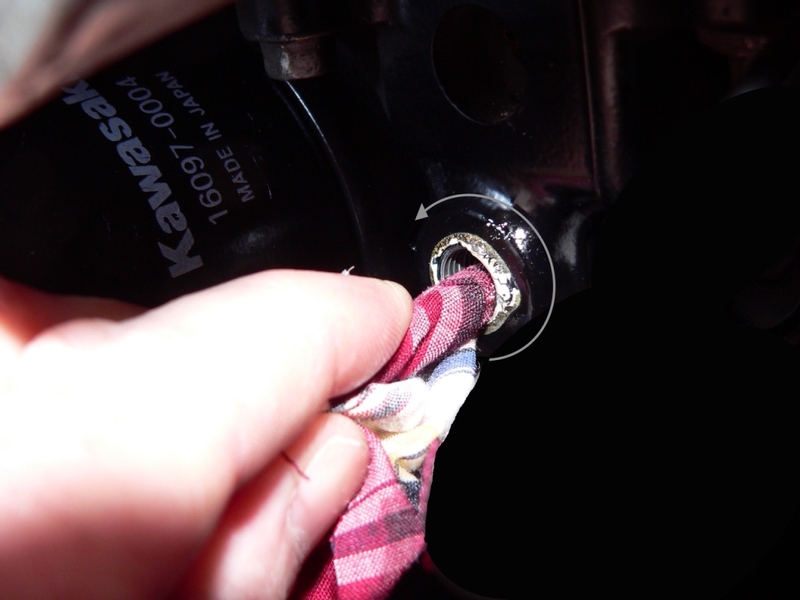
Visually inspect the port with a flashlight to determine if the oil has been removed from the threads. If oil continues to pool in the threads after 20 minutes, the main port must be allowed to drain more. Setting the bike on its side stand so that all oil runs toward the port may be helpful. A vacuum pump may be used to remove as much oil as possible before putting the bike back on a rear stand. Also, arranging the bike so that the front is elevated (be extremely cautious if you do this with the bike on a rear stand) may help to prevent oil seepage into the threads in the port.
Do a close visual inspection of the threads in the oil switch boss to determine if there is sealant stuck in the threads and remove it with a bent needle if there is.
8. Moisten a cloth with mineral spirits and degrease the threads using a counterclockwise motion in the same manner as wiping the threads.
9. When the threads are clean and dry, use a small paintbrush to apply Three Bond 1211 high temperature silicone sealant to the threads of the oil pressure sensor switch. Work the sealant into the roots of the threads with the bristles of the brush. Avoid applying sealant to the first couple threads at the tip so that sealant cannot contaminate the engine after installation.
Three-Bond 1211 is not recommended for copper based metals like brass because it may cause corrosion. Three Bond 1211 sets slowly which gives you time to make adjustments and it has superior sealing qualities. A high temp paste type sealant made by LockTite is another option. I did not think teflon plumbers tape is the best choice for permanent installation but it is still a good choice for some applications (see OIL GAUGES INSTALL, step 5).
10. Tighten the oil pressure switch with a 24 mm socket.?
Torque - Oil Pressure Switch: 15 N·m (1.5 kgf·m, 11 ft·lb)
Allow the sealant to cure for the amount of time specified by the manufacturer before filling the oil pan.
11. Position the spade fork contact on the oil pressure switch bolt so that the wire points up to approximately the 10 o’clock position (see photo, step one of this tutorial). The small washer should be between the head of the bolt and the spade contact
Use a 7 mm socket to tighten the oil pressure switch terminal bolt. You can go much lighter the the specced torque.
Torque - Oil Pressure Switch Terminal Bolt: 1.5 N·m (0.15 kgf·m, 13 in·lb).
12. Apply high temperature grease to the terminal carefully so that the two breather holes in the oil pressure switch are not blocked. 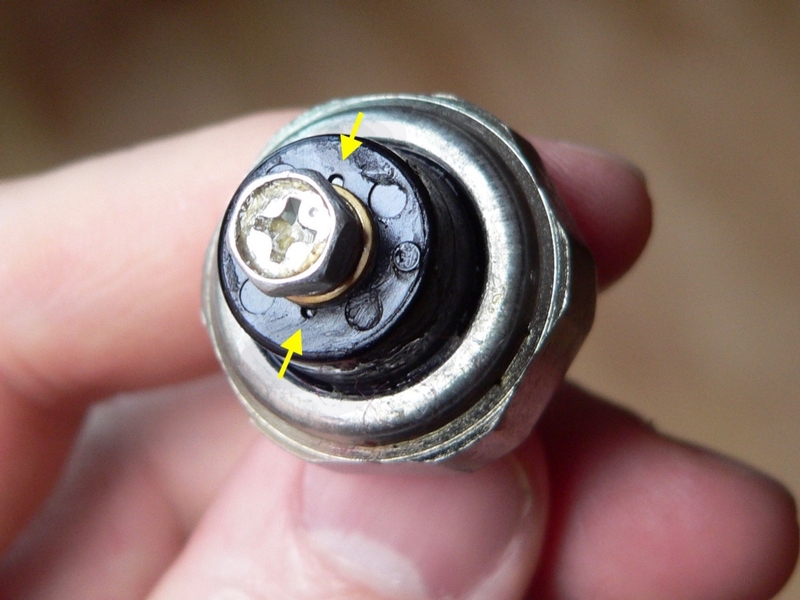
13. Unfold the rubber cover and push it over the oil pressure switch so that it reaches around the back of the flats.
Fill engine oil (steps 6 through 8 of Engine Oil and Filter Change)
Since all of the oil before the oil pump had drained, you may want to prime the oil pump by spinning the water pump with a drill and the proper sized square drive. I do not believe this is crucial if the engine had oil circulate in it previously. If you have ever let all the oil drain from the oil filter mount when changing filters, the oil pump lost prime then, too. Same situation with this.
Install Lower Left Fairing (see Lowers, Fairings Removal)
Connect the battery negative ground screw (see Battery Removal, step 3, reverse procedure)