Move Close
Welcome to zx14ninjaform.com!

You are not logged in.
New Topic Reply
Next Page

Page: 1

Previous Page

Thread: Radiator flush/coolant change

Created on: 01/02/10 08:57 PM

Replies: 19

Rook


Rook's Gravatar

Joined: 03/28/09

Posts: 20579

Radiator flush/coolant change
01/02/10 8:57 PM

Cooling System Flush/Coolant Replacement, Gen1
Do not do this procedure when the engine is hot. The hoses seem to come off easier if the engine is slightly warm, however.

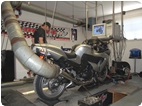
It is best to do this procedure with the bike on its side stand. Raising the bike on a rear stand will increase splattering of coolant while draining. Many of the pics included show my bike on a rear stand but this is unnecessary. A pan may be placed next to the side stand to catch all fluid drained from the water pump. Have a bucket of water and a cloth ready to immediately wash any spills or spatters on the bike.

Do not run the engine without liquid in the cooling system. The water pump can be damaged if run without fluid in it.

The procedure of emptying and filling the cooling system is simple, however after the system is flushed, there may be 8 to10 fluid oz of almost pure distilled water left in the engine. The left over flush water is enough to lean out the fresh coolant that will be added so that it will not have the maximum antifreeze protection. The easy solution to this problem is to just drain the system and then fill it up with fresh coolant without bothering to flush with distilled water. You can also flush with distilled water followed by flushing with a batch of properly mixed coolant. The residual flush water in the system will disperse into the flush coolant. Empty and the flush coolant and add pure coolant until it tests the proper strength with a coolant tester and then pour it back in. Either that or discard the flush coolant and refill the system again with fresh properly mixed coolant.

Because achieving a 50/50 proportion of coolant/distilled water is problematic after flushing with distilled water, I do not suggest using premixed coolant. The adjustments to offset the residual flush water are very small in volume so it is impractical to attempt them with anything but 100% coolant.

Do First:
Turn engine kill switch to off to prevent accidental starting of motor with a dry water pump after draining the system.

Remove ram air tube covers, formans, tank cover fairing, lower fairings and side fairings (Fairing Removal).

Leave the inlet hose connected to the coolant reservoir and remove the reservoir. (Engine Coolant Reservoir Removal, step 1)

Tie the reservoir to the bike so that it does not hang on the hoses.


Tools:
8 mm wrench
drain pan
large empty container
distilled water
handle of a screw driver
Optional: new water pump drain plug gasket
coolant antifreeze tester

Draining
1. Remove radiator filler cap on the right, top side of the radiator. The cap comes off by turning counterclockwise one half turn to the stop and then pressing down to turn one half turn off.

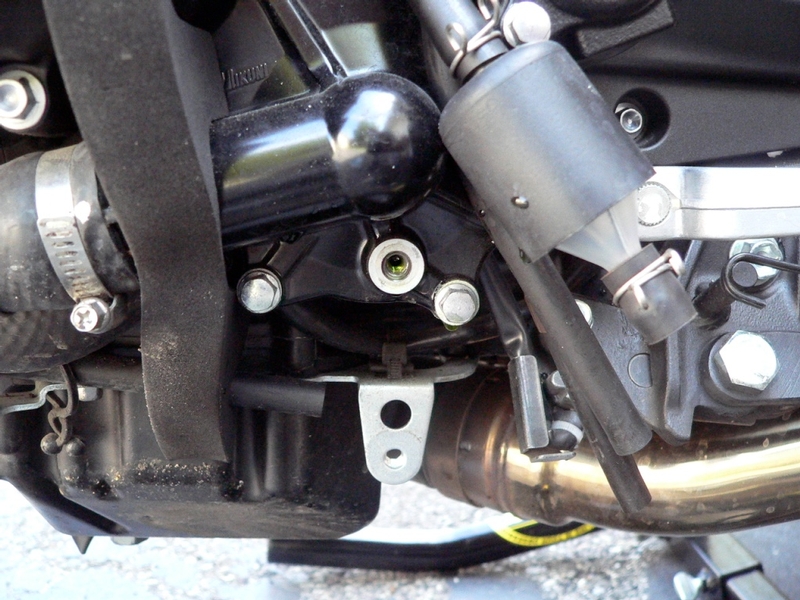
2. The water pump is on the clutch lever side of the bike near the bottom of the engine and it has a large hose encased in a spring coil connected to it.

Remove drain plug and metal gasket from water pump using an 8 mm wrench. The plug has been removed in the photo below.

Be prepared to catch a stream of coolant which may project out of the drain hole about 10 inches. It also may only drip because of surface tension in the liquid but be ready holding the drain pan in case it shoots out.


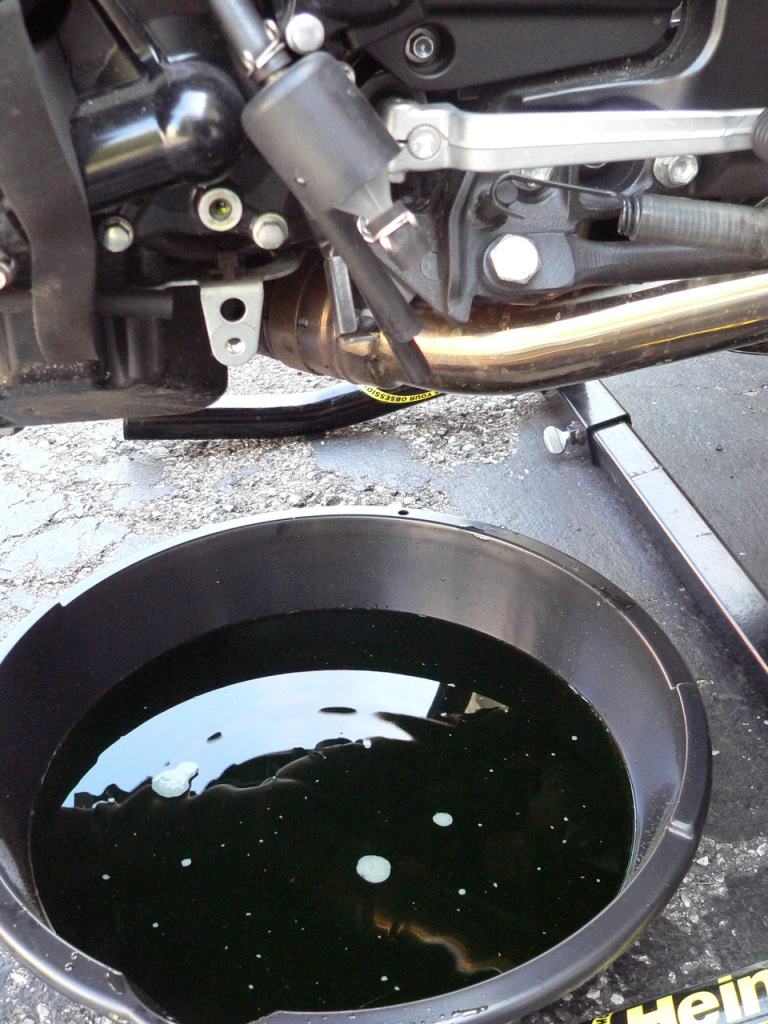
3. When the stream slows, place the drain pan under the bike to catch the remaining coolant.

Install the drain plug into the water pump gently using an 8 mm wrench when the coolant stops running. Avoid unnecessary wear on the gasket and threads.

The radiator is constructed of a tube that runs back and forth several times through the fins in parallel fashion from the filler neck to the radiator exit. The tube turns sharply at the end of each course. Coolant can remain trapped in the tube as well as other parts of the cooling system.

Lean the bike slowly to the left and then to the right as far as possible several times to allow all coolant to run down to the water pump.

Remove the drain plug one more time and drain the final amount of coolant.

Put the drain plug in again snug.


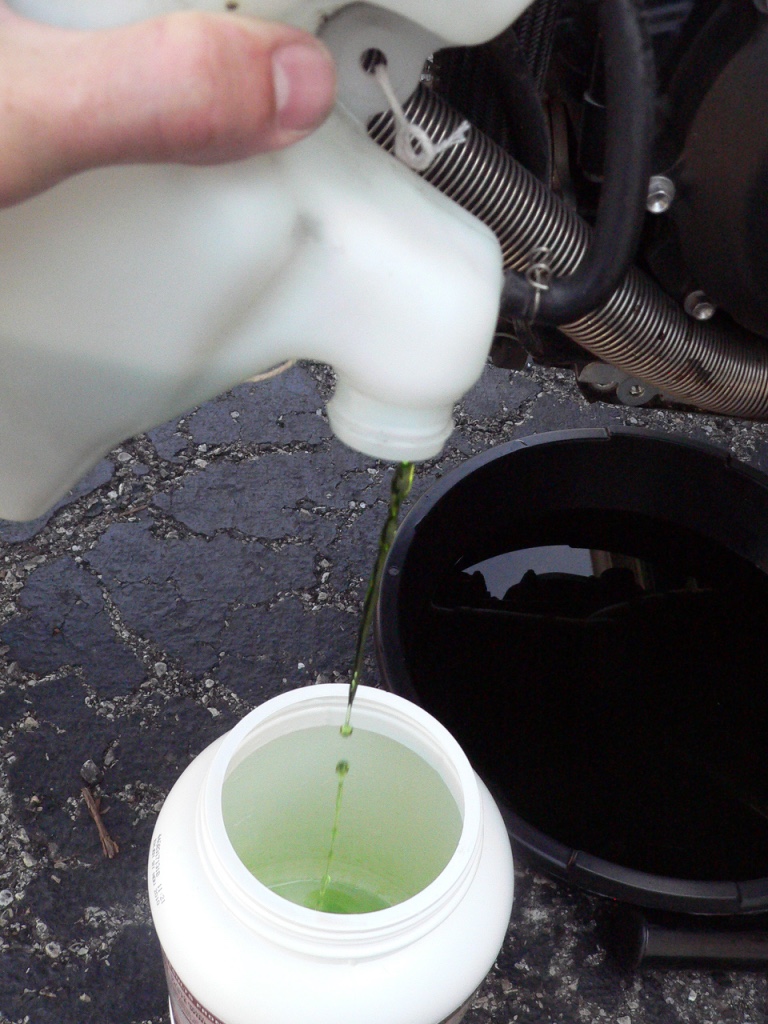
4. Empty the coolant from the reservoir into a large empty container. Also empty the drain pan into the container.


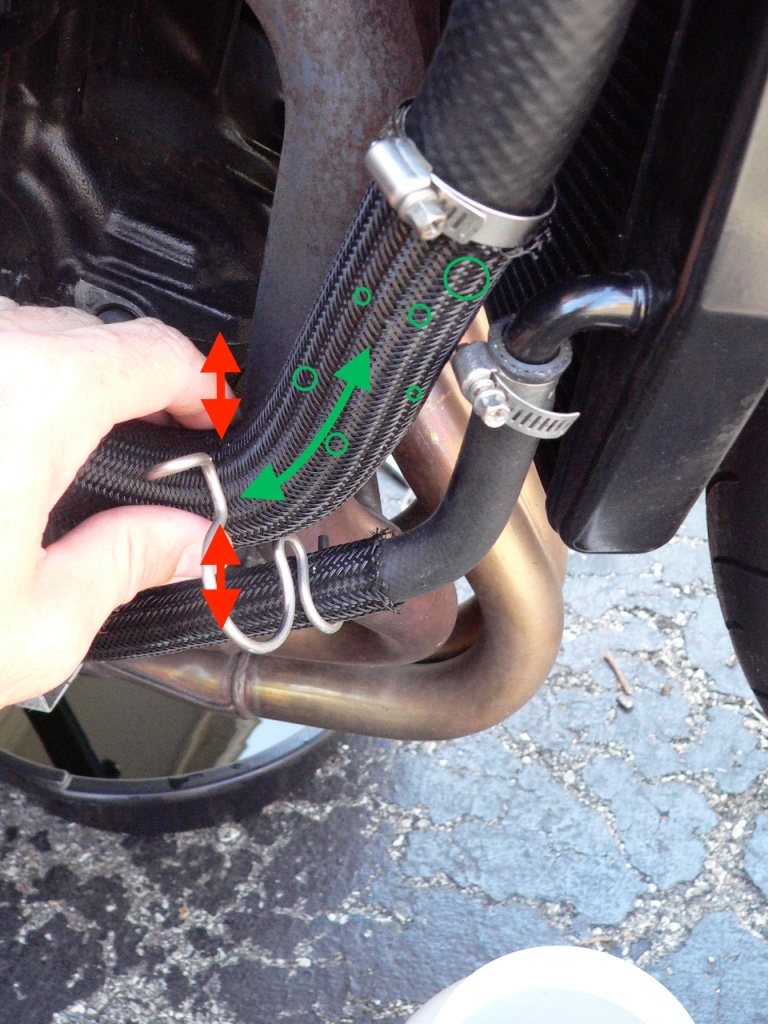
5. Remove one end of each water hose (see Water Pipe Removal —Gen1) and drain the fluid that comes out into the container for disposal.

It is best to empty all hoses if possible but you should drain at least the largest ones.

The hose that is encased in the long steel spring will probably have tiny chunks of gravel around the top edge where it connects to the radiator. It would be best to remove the end of the hose that connects to the water pump if you choose to drain it.

You may notice some chips of paint flaking off of the tips of the water pipe nipples. You might as well try to remove as much loose paint as possible before it ends up in the cooling system.


Fill/Flush
6. Reconnect all hoses. It is not necessary to clamp any of them as they will soon be getting disconnected again.

It is not necessary to reinstall the coolant reservoir.

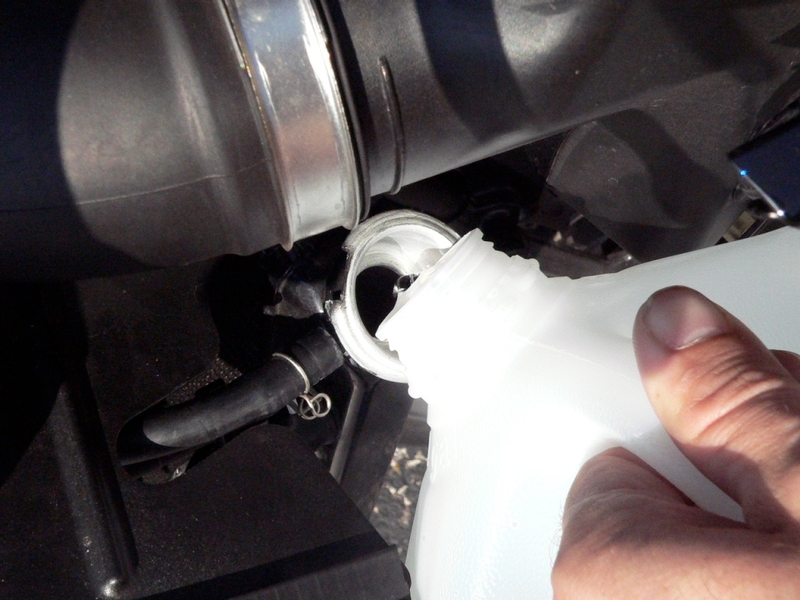
Slowly pour distilled water into the radiator until it reaches the top of the filler neck. It is important to pour slowly to help avoid trapping air in the radiator.

Although the distilled water is only for cleaning out the system, this is also a good opportunity to practice properly filling and bleeding air from the system when it gets filled with fresh coolant.

Do NOT use ordinary tap water even just to flush. Distilled water is inexpensive and it is safe for your system (actually, the Service Manual doesn’t recommend that even distilled water be left in system for long periods of time without being mixed in the proper proportions with coolant).

Burp
7. Install the radiator cap and tilt the bike left to right as described in step 3. Listen for gurgles of moving air pockets.

Remove the radiator cap.

Turn the engine shut off switch to ON, place the key in the ignition and start the engine.

Pour additional distilled water into the filler neck as the engine water jackets are filled by the water pump.

Be prepared to catch the water that drips out of the filler neck as the water expands through warming.

Use the handle of a screw driver to tap all hoses to release air bubbles stuck to the inner walls.

Burp the larger hoses by squeezing and releasing them rhythmically like a heartbeat. This action will surge coolant through the system which will encourage air pockets to dislodge and move downstream.


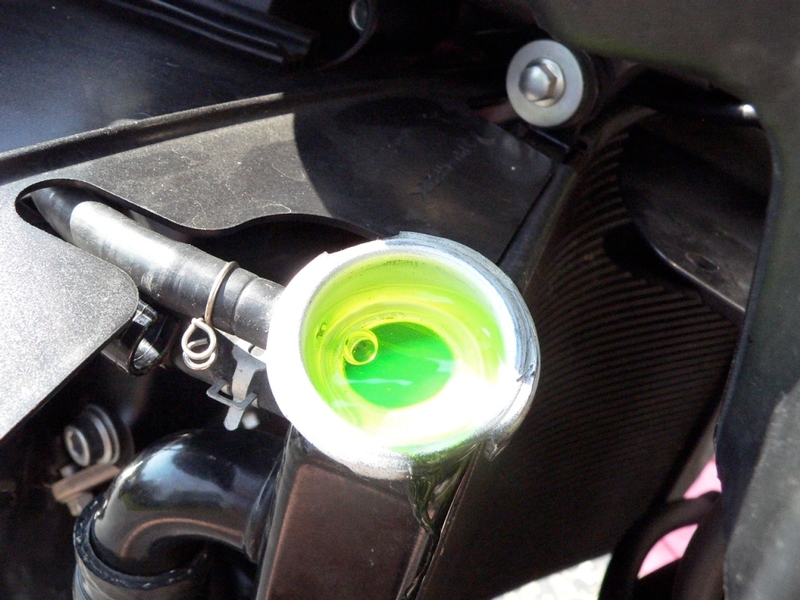
Watch the radiator filler cap as air bubbles rise to the top of the water (see picture, step 14 of this tutorial). When the air bubbles stop, the system is bled of air.

Shut OFF the ignition and engine kill switch.

Use a wet cloth to rinse off the side of the radiator where coolant trickled and all other painted areas where coolant may have spattered.

Drain
8. Allow the engine to cool.

Remove the drain plug from the water pump and catch the distilled water in a pan as in step 2 and 3 of this tutorial.

Remove each hose and empty the water into a pan as in step 5 of this tutorial.

Rinse the inside of the coolant reservoir with distilled water and pour it into a receptacle.

Pour the flush water into a receptacle for disposal.


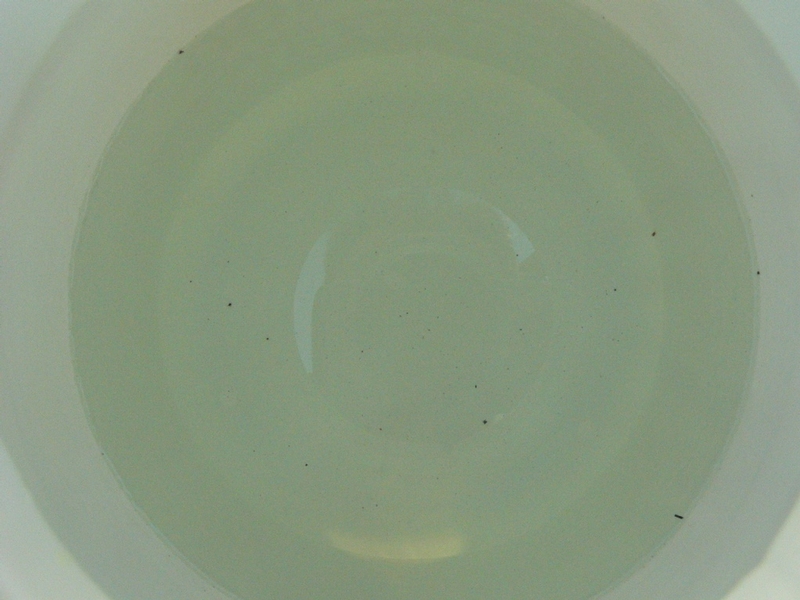
9. Repeat steps 9 through 12 of this tutorial at least one more time. I flushed drained 3 times before the distilled water came out looking almost clear.


Fill/Test
10. According to the Service Manual, the capacity of the cooling system is 3.4 liters (3.6 quarts) but there is a small amount of pure water left in the system after flushing. The amount of leftover water is important to consider as explained in the beginning of this tutorial.

Mix a new batch of coolant according to manufacturer’s directions. Test the fresh coolant with an antifreeze tester and note the result.

Reconnect the hoses and hose clamps (see Water Pipe Removal, Installation).


Reinstall the water pump drain plug and gasket. The service manual recommends a new gasket. In my opinion, it can be reused a few times if the plug is not over-torqued.

Torque - Coolant Drain Bolt: 10 N·m (1.0 kgf·m, 89 in·lb)

Reinstall the coolant reservoir (see Engine Coolant Reservoir, step 3)


11. Slowly pour new engine coolant up to filler neck as described for flush water in step 6.

Do not fill coolant reservoir.

Turn ignition and engine kill switch ON and start the engine.

Burp the hoses as described in step 10.

Run the engine for several minutes to circulate the coolant and mix it with residual flush water in the system while catching the overspill in a pan below the radiator. Save the coolant that spills over so that it may be added later.


12. Turn off the engine and install the radiator filler cap.

Rinse off the side of the radiator and all other painted surfaces that may have come in contact with drips or spatters of engine coolant.

Allow the engine to sit for several hours or over night to cool completely.


13. Remove the radiator filler cap. The coolant level will be low after the coolant contracted from cooling.

Use an antifreeze tester to check the strength of the coolant. It is important to test coolant after it has cooled completely. If it is warm at all, it may test stronger than when it is cool. The coolant will likely be weaker than when initially tested in step 13 because it has mixed with the residual flush water in the system.
14. Add the extra amount of pure coolant or distilled water to the radiator that you estimate is needed to restore the coolant to the proper strength.

Start engine and run for a minute to verify that the system is bled of air. Be prepared to catch any coolant that runs over.

Shut the bike off and pour the overspill back in the radiator until it is full to the neck when resting on the side stand.

Add 50/50 coolant/distilled water to coolant reservoir so that it is filled to between the Full and Low marks on the reservoir.
Install the filler cap and ride the bike to mix the contents of the system thoroughly.

Allow the coolant to cool completely and test again to verify that it is mixed to proper proportions.

Test the coolant when cold. If the proportions still require adjustment, repeat step 17 removing a small amount of coolant first if necessary until the coolant tests to the proper strength.

If the coolant tests to the proper strength, fill the radiator with 50/50 coolant/distilled water to the top of the filler neck with the bike resting on the side stand.

Operate the bike for 50~75 miles to thoroughly mix all the fluid in the system and then test the coolant strength when the bike is cold. Repeat step 17 until the proper strength of coolant is achieved.


* Last updated by: Rook on 12/10/2017 @ 4:41 PM *


'08 MIDNIGHT SAPPHIRE BLUE Now Deceased

Link | Top | Bottom

Grn14


Grn14's Gravatar

Location: Montana

Joined: 02/25/09

Posts: 15511

RE: Radiator flush/coolant change
01/02/10 11:58 PM

EXCELLENT JOB ROOK!Thanks!

Link | Top | Bottom

Rook


Rook's Gravatar

Joined: 03/28/09

Posts: 20579

RE: Radiator flush/coolant change
01/03/10 9:35 AM

hehe- glad someone reads these things. Oh well, they're there for posterity.

As always, you see any info that looks wrong please bring it to my attention and I will edit.


'08 MIDNIGHT SAPPHIRE BLUE Now Deceased

Link | Top | Bottom

bgordon

Forum Administrator

bgordon's Gravatar

Location:

Grand Junction, CO

Joined: 07/19/09

Posts: 1520

RE: Radiator flush/coolant change
01/03/10 12:11 PM

EXCELLENT job, Rook. Thanks very much! -bg

Link | Top | Bottom

buck20


buck20's Gravatar

Location: Peoria, Arizona

Joined: 03/12/09

Posts: 325

RE: Radiator flush/coolant change
01/12/10 4:27 AM

To save some time just use a 50/50 mix when flushing the system then you wont have to wory about testing or how much plain water you have in the system.


To much to list!

Link | Top | Bottom

Rook


Rook's Gravatar

Joined: 03/28/09

Posts: 20579

RE: Radiator flush/coolant change
01/12/10 7:41 AM

Thanks, Buck. I can't believe i never thought of that. It would be awfully expensive to repeat that 3 times before the final fill but I think doing just one flush cleans most of the stuff out. Also, you could flush 2 times with distilled water and use a 50/50 mix for the final flush. That should make the fluid left in the system close enough to 50/50.


'08 MIDNIGHT SAPPHIRE BLUE Now Deceased

Link | Top | Bottom

dogszzr


Joined: 07/22/09

Posts: 6

RE: Radiator flush/coolant change
02/07/10 8:02 AM

great post Rook

Link | Top | Bottom

samuel1352


samuel1352's Gravatar

Location:

Central Valley, Calif

Joined: 02/16/12

Posts: 33

RE: Radiator flush/coolant change
02/23/12 3:39 PM

Just a note to add: My first generation Concours had a drain plug on the water pump, and part of the air bleeding procedure in the manual said to leave this bolt loose during filling and watch it until only coolant trickled out - that would get any trapped air out of the lower part of the system. Seems to me like it would work for this bike too.


1973 Honda CB350F, 1971 Honda SL350, 1976 Triumph Bonneville, 1978 Harley Low Rider, 1999 Kawasaki Concours, 2008 Suzuki Bandit 1250S and 2011 Kawasaki ZX-14.

Link | Top | Bottom

Rook


Rook's Gravatar

Joined: 03/28/09

Posts: 20579

RE: Radiator flush/coolant change
02/23/12 7:11 PM

couldn't hurt to try. I have bled the cooling system twice as described in the tutorial and had no probs with trapped air either time.


side note: do disconnect and drain the two hoses on the left side as/step 11.


* Last updated by: Rook on 2/23/2012 @ 7:12 PM *


'08 MIDNIGHT SAPPHIRE BLUE Now Deceased

Link | Top | Bottom

retsam


retsam's Gravatar

Location: McKinney, Texas

Joined: 04/09/11

Posts: 84

RE: Radiator flush/coolant change
03/12/12 11:21 AM

Im having a few problems with the bleeding. When I fill up the radiator I do so very slowly and up to the neck. With the way my bike sits (on the side stand, or on either or both the front and rear stands), the coolant in the neck tilts off to the side. Having said that, here is what happens. I fill up the radiator, then turn on the bike and tap the hoses to release the bubbles. The water expands and spills over. I get bubbles and they eventually slow. But then the level of the water goes way down and I have to add more water and the bubbles come back. What am I doing wrong? I think the bubbles are coming from the top of the radiator when the level went low. There are no leaks in the system either. Any help would be greatly appreciated.


2010 ZX-14 SE, Ebay Fender Eliminator, Bolt License Plate LED, PCV, Brocks CT Single (4-2-1), 190/55 rear, Under seat USB port, Shogun frame sliders, Tech-Spec Tank Grip Pads, Knight Designs "1 Lower Pegs, on Engine Ice

Link | Top | Bottom

Rook


Rook's Gravatar

Joined: 03/28/09

Posts: 20579

RE: Radiator flush/coolant change
03/12/12 6:49 PM

The water expands and spills over. I get bubbles and they eventually slow. But then the level of the water goes way down and I have to add more water and the bubbles come back.

The same thing happened to me. I'm pretty sure I even saw some tiny bubbles still coming up toward the end of the bleeding. The final fill you just have to do slowly and cap it. Have had 0 problems with hot engine since my coolant change. May have noticed a slight drop in the level of coolant once. If so that was the last of the air finding its way to the top. If its air at the top of the radiator filler neck, no problem. I just filled it to the neck with a bit more coolant. Air all gone.

The level cannot be going down so low in your system that air travels back to your hoses and engine. That is where large pockets can get trapped. The bubbles you see must be coming from the tube that winds back and forth through the fins of the radiator. The tube snakes horizontally making a tight turn at the edge to come back around and cross the other way. Think of a snake's path up the radiator, back and forth. zig zag zig zag zig zag...

Here is what I think: Bleed the first few big bubbles. Tap hoses. Catch the over flow. pour back in very slowly as you are. DO make sure the bike is vertical on a rear stand or something. You can imagine how air would get caught in the crooks of the radiator tube more if the crooks are more vertical as they would be with the bike leaned on a side stand.

These are very small bubbles right? I would take above mentioned bleeding precautions. Let the motor cool, pour what overflow you have back into the rad so it is full. Lock the cap down on the rad and run the engine for ten minutes. Does the motor get any hotter than it had before the coolant change? No? your good. Wait several hours, take off cap off check level if it is right up to the neck, if not pour a few ounces in -- DONE. Take bike off stand, Put on fairings. Ride, see how the bike reacts. If you do not have heating problems at an idle or riding, those tiny bubbles (in the wine) are nothing. Just like a swirling jacuzzi with an occasional air bubble tha comes up. I'm sure every bit of air is eliminated eventually.

Lemme know how it goes. Like I told you, I saw a few bubbles every couple seconds, too. NOT a problem. I also struggled with the overflow/air bleed conflict. We novices tend to focus our attention on unimportant issues because we don't know what is unimportant.


* Last updated by: Rook on 3/18/2012 @ 11:51 PM *


'08 MIDNIGHT SAPPHIRE BLUE Now Deceased

Link | Top | Bottom

Rook


Rook's Gravatar

Joined: 03/28/09

Posts: 20579

RE: Radiator flush/coolant change
03/12/12 6:56 PM

how many shops would even pay attention to this?

0

You are way better than a veteran mechanic who never has the proper amount of time to do his work. or worse yet you get someone with little more experience than you who is equally pressed for time.


'08 MIDNIGHT SAPPHIRE BLUE Now Deceased

Link | Top | Bottom

retsam


retsam's Gravatar

Location: McKinney, Texas

Joined: 04/09/11

Posts: 84

RE: Radiator flush/coolant change
03/18/12 10:41 PM

I have to give a big thanks to you Rook! Your write up was awesome and on point! As far as the bubbles, I ended up just getting it as close as I could. Everything went well as far as I can tell. I did this to switch to engine ice and the bike does seem to be much much cooler! One other thing I struggled with was the mixture. Since Engine ice comes pre-mixed, there was no way for me to get the mix right. After the final flush, I tried to get as much of the water out as I could. Then I left the drain bolt off and poured the engine ice in until it seemed like nothing but engine ice came out of the drain plug. I then replaced the cap on the radiator (to slow the drain a bit). After I replaced the drain plug, I continued the process of bleeding and filling. Using this process I lost a bit of engine ice but not enough to cause concern. Im sure the mix is still a bit off but the engine ice is working well.

Again, thanks for all the great info Rook! Its greatly appreciated!


2010 ZX-14 SE, Ebay Fender Eliminator, Bolt License Plate LED, PCV, Brocks CT Single (4-2-1), 190/55 rear, Under seat USB port, Shogun frame sliders, Tech-Spec Tank Grip Pads, Knight Designs "1 Lower Pegs, on Engine Ice

Link | Top | Bottom

Rook


Rook's Gravatar

Joined: 03/28/09

Posts: 20579

RE: Radiator flush/coolant change
03/18/12 11:50 PM

Glad the tutorial helped.

You get a lot of practice bleeding because you can/should bleed the flush water. Same thing all over when you put in the coolant.


* Last updated by: Rook on 3/18/2012 @ 11:54 PM *


'08 MIDNIGHT SAPPHIRE BLUE Now Deceased

Link | Top | Bottom

Rook


Rook's Gravatar

Joined: 03/28/09

Posts: 20579

RE: Radiator flush/coolant change
11/24/14 8:31 PM

I just filled the system after removing all hoses. Thought I'd mention how nice it works to bleed the system with the bike on a rear stand. The overflow simply runs over the rounded edge of the filler neck and you can catch it in a beaker or clean container placed on the floor below. None of the coolant even touches the side of the radiator. After you shut down, pour the beaker into the radiator. Let it cool all the way down and check the level through the filler neck one last time.


'08 MIDNIGHT SAPPHIRE BLUE Now Deceased

Link | Top | Bottom

tj2k


Joined: 10/09/16

Posts: 1

RE: Radiator flush/coolant change
10/09/16 11:56 AM

Hi all, 1st post!

I have a bog-standard 2016 ZZR, it's just about done 300 miles, so still breaking it in (it's my 2nd ZZR, having had a 63 plate briefly).

I've taken the (striped) side fairing off to route cabling from some Oxford Heated grips I've fitted and purely because I was nosey, I looked at the coolant tank on the left hand side of the bike.

I took a picture of it for what its worth but I couldn't see any coolant within - apart from a little condensation drips at the top on the inside of the expansion tank.

The bike was cold, not having run since yesterday (Saturday - it being Sunday as I write this).

Pointing a torch from top down, at the very bottom, I do see some green coloured coolant - but of course, the coolant level is therefore well below both "L" and "F" marks (& the bike is stood level, though leaning to the left given its on the side stand).

So clearly, I have low-coolant. Although I have not seen coolant escaping - or evidence of such on the inner fairness / hoses / radiator or experienced any over-heating / high temperatures etc.

So I was tempted just to top it up with distilled water however, that would weaken the antifreeze strength (as it suggests in the user manual) and I don't fancy having the coolant totally drained & replaced when its so new. The journey to the dealer for it's first service @600 miles is 50 +/- miles away. So now I know the level is low, I'd rather resolve this prior to any further usage.

I strongly suspect that the supplying dealer simply hasn't filled it up sufficiently / checked it (at all) on PDI. I already have an ongoing issue with the supplying dealer (which p*ssed me right off) which they're putting right when it goes in for its 1st service.

So, does anyone know which anti-freeze is in there? This so I can simply buy some and not mix another brand / wrong type / colour in there - or; is there some other advice I'm in aid of??

I do have some Halfords anti-freeze (the "Advanced" 5yg stuff) which is pink in colour - so if its compatible - the colours will mix and look odd - so suspect I'd have to drain all of it to use this stuff.

Eager to put the bike back together & minimise fuss as well if possible!

Thanks a million in advance :-)


* Last updated by: tj2k on 10/9/2016 @ 12:02 PM *

Link | Top | Bottom

piken


piken's Gravatar

Location: Phoenix, AZ

Joined: 08/27/15

Posts: 664

RE: Radiator flush/coolant change
10/09/16 1:10 PM

you don't say where you are from?

How cold does it get?

Adding a cup or two of distilled water will only change the
mixture very slightly. Maybe change protection from -34f to -33f
if mixed 50/50

They probably just didn't get all the air bubbles out.

Use your antifreeze tester and make sure you are protected to
the point of freezing you want to be.

Just add some distilled water to the reserve.

Living in AZ I do not even have anti freeze protection in my bikes and
always flush annually all bikes.

I use Maxima Cool-Aide mixed with soft water.

P.S. - Welcome to the site!


* Last updated by: piken on 10/9/2016 @ 1:12 PM *

Link | Top | Bottom

Rook


Rook's Gravatar

Joined: 03/28/09

Posts: 20579

RE: Radiator flush/coolant change
10/09/16 1:24 PM

I took a picture of it for what its worth but I couldn't see any coolant within - apart from a little condensation drips at the top on the inside of the expansion tank.

It's no especially important to have the bottle to the proper level. It's an expansion tank. your coolant which should be plumb full to the neck of the rad gets hot and expands. needs to go somewhere when it expands too much so it goes to the bottle and gets sucked back when the coolant contracts.

I have low-coolant. Although I have not seen coolant escaping - or evidence of such on the inner fairness / hoses / radiator or experienced any over-heating / high temperatures etc.

Not necessarily too low. I don't think there is much circulation happening in my 08's coolant res and I have the rad full. Just take your radiator cap off and look. leave the bike on the sidestand. if it's vertical coolant will spill out when you remove the cap.


So I was tempted just to top it up with distilled water however, that would weaken the antifreeze strength (as it suggests in the user manual) and I don't fancy having the coolant totally drained & replaced when its so new.
Distilled water NOT tap water---must be "distilled." If it was just just a few hundred mls, that probably would not be enough to seriously alter your antifreeze strength. Remember coolany is one thing but anticorrosive effect is another. You need the coolant / distilled water mix to be 50/50 to optimize both. Might as well check that strength with a antifreeze tester (get a little more expensive one---those things are not always perfectly reliable I've found 4 balls float, 5 balls ??) while you have the radiator cap off and before you add anything. But wait, read on.

I strongly suspect that the supplying dealer simply hasn't filled it up sufficiently / checked it (at all) on PDI.

Possibly. I am not certain but I think the bikes may come with coolant in them. My 08 was also found to be low on coolant when new. Might just be a part of the break in. If you don't see any water in the oil when you change it, I would not worry a bit as long as you get the level where it should be in the rad which is FULL.


So, does anyone know which anti-freeze is in there? This so I can simply buy some and not mix another brand / wrong type / colour in there - or; is there some other advice I'm in aid of??

My coolant from the dealership was blue which is odd. Most are green. Colr does not matter at all but two things do matter. first and foremost, use ONLY coolant for aluminum engines. Second, you are wise to not mix and match coolants but for a small top off, I would not mind adding a bit of brand A to Brand B as long as both are for aluminum engines. Third is your option. I really think it's best to stick to motorcycle coolant cuz the bikes do run hotter than cars. IDK if mc coolant really does anything to compensate for this dif but how often do you need to put coolant in? I know someone with an 06 who has never changed coolant. SO, I would just go get Kawasaki AlumaCool and use that because that satisfies all of the above criteria. Kawasaki Aluma cool is not premixed and that is better because.....if you found your coolant was weak when you tested it with your more expensive coolant tester, you will want to add pure coolant. Just a small amount. run the bike and test the coolant again. Test when cold only, it seems to matter. Then add more. Distilled if its rich, pure coolant if its lean. Run to disperse and heck again when cold. OR if your initial test was good, just add the alumaCool mixed with an equal portion of water. Dump some in the coolant bottle if you want.


I do have some Halfords anti-freeze (the "Advanced" 5yg stuff) which is pink in colour - so if its compatible - the colours will mix and look odd - so suspect I'd have to drain all of it to use this stuff.

As mentioned above, use only if it's for aluminum engines and better if it's for motorcycles. Also if you need to add a lot, it's probably best to just get some of what's in there which is no doubt AlumaCool. $11/ bottle but cut that in half for the distilled water you will probably use and it's cheaper than premixed Suzuki coolant which sucks because you cant add pure coolant if it's premixed already.


Eager to put the bike back together & minimise fuss as well if possible!

Go get AlumaCool, mix 50/50 with distilled and pour it in to the neck. Dump whats left in the coolant reservoir.

I think I hear an Aussie accent. Am I right?


'08 MIDNIGHT SAPPHIRE BLUE Now Deceased

Link | Top | Bottom

Rook


Rook's Gravatar

Joined: 03/28/09

Posts: 20579

RE: Radiator flush/coolant change
04/25/17 10:52 PM

updated


'08 MIDNIGHT SAPPHIRE BLUE Now Deceased

Link | Top | Bottom

Rook


Rook's Gravatar

Joined: 03/28/09

Posts: 20579

RE: Radiator flush/coolant change
12/10/17 4:42 PM

done again


'08 MIDNIGHT SAPPHIRE BLUE Now Deceased

Link | Top | Bottom


Welcome to zx14ninjaform.com!
 
New Topic Reply
Next Page

Page: 1

Previous Page

New Post

Please login to post a response.