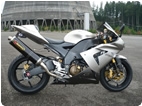
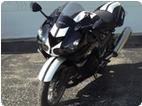
Okay...smokin has a good vid...UNFORTUNATELY...he doesn't actually show you how to do it...which really means everything with this new bike.
You want that side cover off.
Remove the three bolts on the side there.Like the earlier models.Okay....NOW...at the front of the belly/midfairing,there's an allen bolt...small...inside that seam.Loosen that...don't remove.Loosen good,till that metal bracket can be turned around on the bolt.You CAN remove that bolt if you're more comfortable doing that.It HAS to be loose enough to let the bracket clear the plastic tiny tab sticking out.You'll see it in there once you loosen the bolt.DO NOT force that bracket around the teensy tab UNTIL it's loose enough to clear that tiny projection.You'll snap that projection off.That holds the bracket in the right place while tightening.
Okay...now...to the rear part of the belly/midfairing seam.Just inside the rear part,there's another screw...this one a Phillips.I had to use a 90 degree small phillips in there to get to it.That one needs to come OUT...all the way.NOW...midway on the cover...look in and see that rubber attachment piece.The one with the black small allen bolt in it.Remove that bolt.DO NOT REMOVE ANY PUSHPINS.Leave those alone for removing only the side cover/battery cover.
Gently work that rubber boot over and behind the plastic tab of the cover itself.If you try to move the cover backwards with that rubber deal on that tab,you may end up snapping it off from pulling outward at the rear part of the cover.I had to use a flattip screwdriver first few times to get it started going forward and around the tab.BE CAREFUL!!!!!!Do not force that screwdriver against that tab.Work it gently and watch what your doing!You can fold that rubber deal pretty good,it won't break or anything.But it has to clear the cover tab.Kinda scarey at first.You'll see what I mean.Use a big bladed flattip...you don't want to rip that rubber holder right there.It WILL bend around that tab however.Just don't force that tab inward as you're doing this.
Okay...NOW....CAREFULLY....grab the rear part of the cover..gently slide that rear part downward...to clear the tabs on the tank cover above.Once cleared,straighten back up and now rock the rear part up and down while pulling backwards towards the rear of the bike.The front four tines will begin to slide back.They are attached two each with a molded "plate" holding them secure in the cover.It's all ONE PIECE.Rock that cover up and down carefully while pulling back as I said...and watch the tines so they start coming back freely.You can get your hand in there behind em and feel if they're hanging up.If so,just apply some pressure wherever you need to to help them slide out of those pockets under there.They have a small downward cut groove in them that kinda 'locks' over a plastic pin in the pocket deal.Then it's a straight shot back.Go slow...it'll slide out.Be patient...keep pulling while rocking up and down..Then you can remove that battery cover easily from there.
Reinstall the same way...AND DON'T FORGET THAT BLACK RUBBER COVER HOLDER,with black allen bolt.You may be able to slide that small tab into that rubber holder as you're sliding the front of the tines into the pockets(if you don't 'forget'(like I did).Get that back over that tab,and align any area right there together.Slide the front 'plates' back into the pockets,then pull downward a bit to get those upper tabs back into the tank cover piece.Attach the cover bolts.Snug only.
The front small allen...at the midfairing/belly fairing seam(inside)...get that in there and align the metal bracket with that small projection again in the small hole on the bracket(holding the mid/belly seam together.Tabs in place along the belly fairing.
I left the rear phillips screw OUT.Purposely.It's a nightmare trying to reinstall that thing,or get it out.To me...it actually doesn't do anything to hold that fairing together or in place.The tabs do that just fine.And the front bracket won't allow any separation to occur.I'm not sure WHY they put that phillips in there.If you gently pull on the two fairing pieces right there...you'll see....no movement out of place one the tabs are inserted into the midfairng.
Sounds complicated...but once you get er a couple of times...no biggie.....Front bracket inside midfairing/belly fairing.
 Front pocket
Rubber central cover attachment(bolt in place so I wouldn't lose it).


That bottom pic shows the rearmost tank cover bolt in the wellnut.That will be OUT when you pull downward on the rear of the cover to slide out.
You know...I just realized something....all that explanation about the lower fairing bolts,the belly bolts.All that is NOT necessary to remove IF you're only removing the side covers.Sorry.I forgot I was talking about my replacement of my belly fairings when I got my new ones in!The cover will have the one black bolt(allen) at the center.And the two rear tank/side cover bolts.Just remember..you do have two projections under that side cover which need to be pulled away from their grommets under there,then you can slide the cover back as mentioned.
* Last updated by: Grn14 on 2/15/2012 @ 4:23 AM *


 Front pocket


