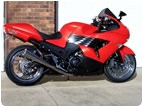

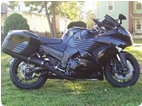


I installed a couple items on my 14R over the weekend, a Stebel Compact horn, and a set of GSG Mototech frame sliders.
These instructions are for the GSG frame sliders. Search this site for Stebel Horn, or search for my posts.
I chose the GSG Moto equipment for a couple reasons:
No fairing mods required.
Interfaces to the cycle frame provide more contact than just a through-bolt.
Usually "get what you pay for" mentality on my part.
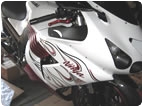
I could not find decent pictures of the GSG equipment. Not on their site, not on any user's site. I took a chance with them, hoping that the equipment would be as robust as I hoped.
I was not disappointed. The sliders are robust, and offer more "contact patch" to the cycle frame than the Chicom knock-offs.
They also offer replaceable end-cap plastic parts. That is, not just the sacrificial knob on the end of the post (which is also replaceable). For a zero MPH tip-over, the very end of the cap is a pop on/off piece of plastic that is replaced with no tools involved. Pop off the damaged cap, pop on a new one, it will take less than a minute each.
The equipment is also unique in that it provides more than one contact bolt point to the frame. Unfortunately, this is true on only one side. But, it's the same side as the side stand (think: if it happens to fall over...).
The other side is also very robust in contact, but there are fewer frame bolts available for GSG to work with. So, they chose a design that "wraps around" the frame at this point of mount. That is, the frame slider mount has a beveled inlet that fits over and around the mounting bolt frame patch.
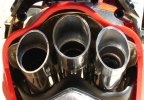
The slider-arm extension to frame-slider-mount-point is a contact patch larger than the size of a silver dollar (see the pictures). The slider arm extension is also an intriguing design. It's an extruded piece of aluminium (I think), and "honeycombed". It's definitely well designed to absorb twisting and bending moments of inertia. It looks designed to "give" or crush, during sliding use.
As for a tip-over event, I think the idea was to spread the energy over as much surface area as possible, but still allow the parts to crush (instead of allowing the frame-to-engine block interface absorb all the energy through the connecting bolt). The part I'm not sure about during a tip-over is, the slider arm extension mounts at a small distance offset from the frame slider mounting bolt.
That is, there is a long bolt that attaches the slider arm extension to the frame slider mount. Then, there is another bolt that mounts the frame slider mount to the frame. These two bolts are offset by an inch or thereabouts (and this is what allows the sliders to mount without cutting any fairing bits).
So, in the event of a tip over (or a slide), the offset will apply a torquing, twisting moment "around" the frame mount point. The Chicom stuff does this, too, if sliding. But not during a tip-over. These GSG parts will apply this type of force during a tip-over. I dont know what's better... All I can say is, I'm glad I got these (but, I would have preferred a "Canyon Cage").
Because of supply line length, and the difficulty (and cost) of performing the cash transfer to Germany (took me an hour, and $40, to sort out all the details: They (GSG) required a direct bank-to-bank wire transfer. No credit card, no paypal, nada...). Because of this, I bought extras: Extra end caps, extra slider arms, extra sacrificial caps, you know... extras, just in case.)
So, to the installation...
The instructions from GSG are in German, and English. Mostly German. There's enough to intuit what needs to be done, and the correct torque values are shown.
It's easy, and you *could* do it without removing any of the fairing bits. I had the side fairings off, already... The hard part is cutting one of the rubber "boots" to expose one of the mounting bolts. The bolt is normally covered, out of sight behind the rubber boot. Getting in there to get the rubber boot off / cut / and back on again would be, ah, "difficult" without removing the side fairing.
So, get both of the side fairing off. Go for a ride, and get the engine to operating temperature.
ONE SIDE AT A TIME. The GSG parts are side-specific. Make sure you have the correct parts for that side. Get the engine hot to soften the red loctite on the engine-to-frame bolts.
Right side first. Remove the engine to frame bolt (an 8 mm hex allen head cap screw). It's red loctite'ed (all the engine-to-frame bolts are...). I used an 8mm allen with a 1/2" drive, on the end of a 1/2" drive, 2 ft. long bar wrench. Using that, the loosen and twist-off was easy. Grunt factor was very low. Now, replace the removed OEM bolt with the GSG part, use some fresh loctite (I used blue). Select the right side frame slider mount and bolt, position them such that the slider arm extension will stick out through the foreman grill bars, and torque on the frame slider mount. Use an 8mm allen hex drive, and use a torque wrench calibrated in newton/meters if ya got one. Apply torque to 40 NM. That's the easy one...
Now the left side. Remove the engine to frame bolt (an 8 mm hex allen head cap screw). It's red loctite'ed. Pull back the rubber boot and expose the 2nd bolt. Eyeball it, and determine how much boot to cut away. I cut away all of the bolt cover, but left a rubber piece that holds the boot in place, near it. Remove the 2nd bolt (10 mm, I think I remember). Replace the removed OEM bolts with the GSG parts, use some fresh loctite (I used blue). Select the left side frame slider mount and bolts, position them such that the slider arm extension will stick out through the foreman grill bars, and torque on the frame slider mount. That's the hard one...
Put the frame bits back on.
Using the side-specific long bolts, mount the arm extensions through the foreman grill bars and apply torque to 35 NM using the 8mm allen hex drive. Use Loctite.
Pop an end cap on each side. Done!


 . For anyone wanting to know.