


LSL Frame Sliders Install
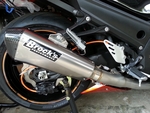
LSL frame sliders are designed to prevent damage according to every bike’s specific crash characteristics. The ZX-14 LSL frame sliders have a two point frame mount which distributes the shock rather than transferring it to one point directly behind the slider. LSL sliders have a plastic cushion that is designed to soften the initial impact of a crash and also prevent spinning of the bike as it slides across pavement. The main slider puck may never contact the ground if the plastic cushion endures the entire slide. The plastic cushion can be replaced and the sliders may avoid damage as well as the motorcycle.
The ZX-14‘s body panels are wide and they require long mounts which act as levers in a crash. For this reason, any slider on a ZX-14 might actually cause frame damage that is worse than the fairing damage the sliders prevent. It is best to go with sliders that have a good reputation such as LSL or not use sliders at all.
Tools:
front and rear stands
8mm hex tool socket.
2 1/2” x 4” x 3/4” soft wood block
floor jack
ruler
nonpermanent thread locking agent
6mm hex tool socket
torque wrench
12mm socket
Right Side
1. Remove the foremans, lowers and side fairings (see FAIRINGS REMOVAL). Place the motorcycle on front and rear stands so that it is parallel to the floor.
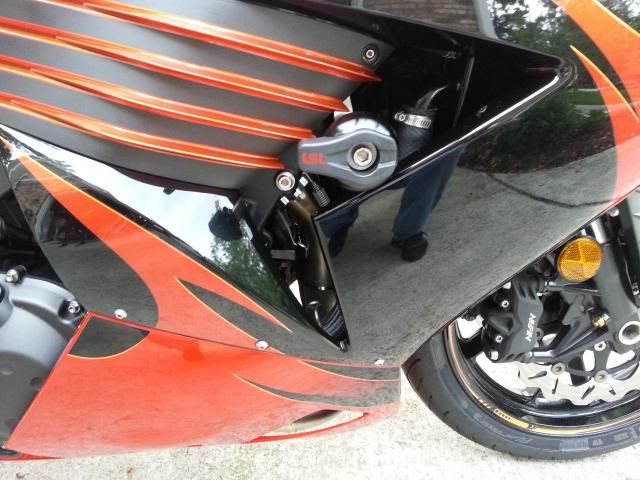
2. The holes on the right side marked by the gold pointers in the photo below are on the front engine bracket under the airbox. The top hole has nothing in it. The bottom hole is an engine mounting bolt and it should be broken loose using a 8mm hex tool socket. The Left side front engin mounting bolt may also be broken loose at this time but DO NOT REMOVE ANY OF THE BOLTS AT THIS TIME AS THEY ARE SUPPORTING THE MOTOR!!

4. Cut a 2 1/2” x 4” block from 3/4” soft wood. This will be to placed under the oil pan as a backup measure. I normally do not lift under the motor to support the bike but it would be an emergency situation if the motor required support and the rest of the bike would be supported by the stands.

5. Place the block of wood on the center of a floor jack and raise the jack enough so that the wood block touches the underside of the oil pan. Avoid placing the wood block over the oil drain plug or the drain plug guard.

6. Using a ruler, measure the shank of the large (10mm thread diameter) bolts included with the sliders and select the one with the 50mm long shank. Also select the smaller (8mm thread diameter) bolt with the shank that measures 25mm.

7. Using a 8mm hex tool socket, remove the OEM engine mount bolt and it’s washer. Do not remove any other engine mounts until the right slider mount has been installed securing the right engine mount. Do not remove the pink factory thread locking agent from the threads. It is reusable if the OEM bolt should be reinstalled.

8. Place the right slider mount. Apply nonpermanent thread locking agent to the small bolt and thread it into the top hole using a 6mm hex tool socket. Apply nonpermanent thread locking agent to the large bolt and thread it into the bottom hole of the bracket using an 8mm hex tool socket.
Torque specs: top slider mount bolt to 13.5 ft lbs
bottom slider mount bolt 44 ft lbs.

9. The sliders go together as shown in the picture below. The 10mm threaded bolt with 125mm shank passes through a spacer, nylon cushion, slider puck and post. The larger diameter of the post goes against the back of the puck. Install the slider assembly to the slider mount using an 8 mm hex tool socket.
Torque spec: slider assembly mounting bolt 25 ft lbs.
Left Side
10. Make sure the floor jack is still under the motor and that the right hand side bolt that secures the engine mount has been torqued as described in step 8. Use a 12mm socket to remove the subframe bolt and washer from the left side subframe member. Use an 8mm hex tool socket to remove the engine mount bolt and washer below it.

11. Place the left slider bracket. This part is designed to be used with the OEM washer between it and the subframe. Pick out the bolts with 65mm shanked, 10mm thread bolt and 8mm thread 30mm shank bolt. Apply non permanent thread locking agent to the threads of the bolts. Use a 6mm hex tool socket and an 8mm hex tool socket to draw the bolts up evenly. Refer to step 8 for torque specs.

12. Refer to step 9 to assemble and install the left slider post, puck, nylon cushion, spacer and bolt.

Weight

The slider parts weigh 1 pound 9.3 oz.

The bolts weigh almost an additional 3/4 lb. The total weight of the LSL slider parts installed is 2 lbs, 3.1 oz.

The OEM parts removed to install the sliders weigh 3.6 oz.
Net weight gain of 1 lb, 15.5 oz.
* Last updated by: Rook on 6/23/2015 @ 9:40 PM *