Move Close
Welcome to zx14ninjaform.com!

You are not logged in.
New Topic Reply
Next Page

Page: 1 2

Previous Page

Thread: If you've installed a Hyperpro damper

Created on: 12/14/14 11:45 PM

Replies: 47

Rook


Rook's Gravatar

Joined: 03/28/09

Posts: 20589

RE: If you've installed a Hyperpro damper
12/24/14 8:33 AM

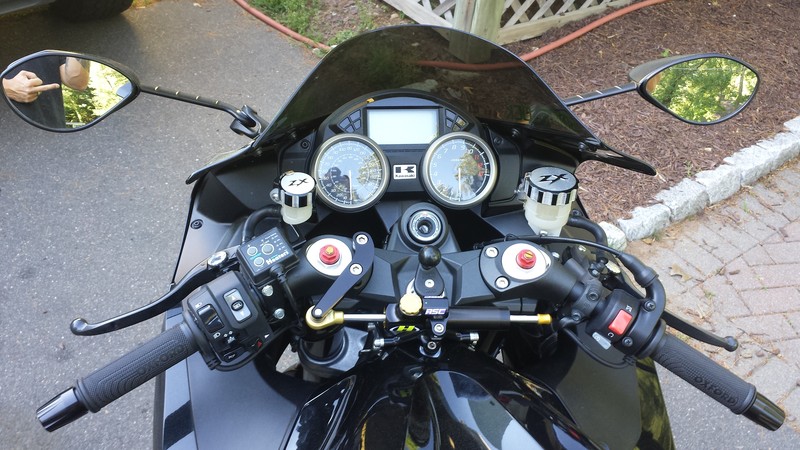
1) any tricks, or just how did you slide your damper through the clamp, to make sure you didn't scratch the damper up?
2) Now that I have a new set up again am thinking about selling it and getting the Brocks/ohlins. What would really be a slick set up is the hyperpro RSC with the Brocks mount.

1. Very carefully. Twist and push. That's all I did and not a single scratch. I NEVER plan to remove it or adjust the position unless I have to because I don't want to risk scraping it. You might consider prying the clamp VERY softly with a screwdriver wrapped in tape so it flexes open just a hair. careful there. Aluminum doesn't flex much before it bends.

I recently removed and installed front suspensions. I just gently pried the clamp while twisting and pushing at the same time. The tubes slid in/out, No scratches there either. Like the Hyper-Pro damper, fork tubes have tiny ridges lathed onto the surface. I believe the ridges help the tube slide through without scraping. Seems to work amazingly well but be careful.

2. Looks like the Ohlins bracket has a clamp that accommodates the oil tube and the adjuster tube. The Hyper-Pro has no adjuster tube so you'd need to put an aluminum rod of the right diameter in there or just leave it as is. Either way, I think you're going to have a tube that is more likely to slip if you ever do have a tank slapper. If the Hyper-Pro clamp will fit with the Ohlins brackets, I guess you'll have it.


* Last updated by: Rook on 12/24/2014 @ 8:34 AM *


'08 MIDNIGHT SAPPHIRE BLUE Now Deceased

Link | Top | Bottom

Grn14


Grn14's Gravatar

Location: Montana

Joined: 02/25/09

Posts: 15511

RE: If you've installed a Hyperpro damper
12/25/14 8:43 PM

My hyperpro is solid as a rock in that clamp...the cylinder OD has thin small grooves running around it.When tightened...these help secure the body to the clamp.It isn't going anywhere...and I agree totally with Yannih...this RSC damper is killer. Hard input dampen harder the more force is applied.If you have this set mid to higher damping...this thing WILL stop any front wheel side to side motion extremely well.It will apply the needed 'extra' damping force for any given jarring of the frontend.Yet be mild for light riding or turning and such...like in a parking lot.Does the Ohlins do that?Or the GPR...or Scotts?


* Last updated by: Grn14 on 12/25/2014 @ 8:48 PM *

Link | Top | Bottom

smatlock42


smatlock42's Gravatar

Location:

Manchester, Connecticut

Joined: 07/10/13

Posts: 819

RE: If you've installed a Hyperpro damper
01/02/15 11:13 AM

I installed one on mine. everything fit perfectly. no issues or fitment problems at all.


14 NATION RC
Predator Race Team #42

Ride on Bitches!


Link | Top | Bottom

Rook


Rook's Gravatar

Joined: 03/28/09

Posts: 20589

RE: If you've installed a Hyperpro damper
01/02/15 12:53 PM

LOL that's because they fixed it now!

Nice mirror shot!


'08 MIDNIGHT SAPPHIRE BLUE Now Deceased

Link | Top | Bottom

14isKing


14isKing's Gravatar

Joined: 02/16/19

Posts: 35

RE: If you've installed a Hyperpro damper
03/27/21 5:23 PM

Hey guys, Just picked up a Hyperpro Rsc Damper for my 12' 14r.I just began installing, putting the bracket together and mounting to steering column.I had a question about the Black Philips Head screws in the steering column. It is more than a pain in the ass to get off.i have heated the screw twice and won't budge.the screw is damn near about to strip entirely and il have a bigger issue.. Sometime I really wonder what the hell is Kawi thinking when putting bikes together!??...one side they actually use a bolt that comes off no problem ...the other side wtf!Any recommendations?


2012 Custom Matte Black-Silver/Orange Paint Scheme.
Secondary Flies out/ECU Flash & Tune by Nels (2WheelDynoWorks) **Updated to Brocks/GUHL Flash 2 package / PCV Map Switch (Savage Mode) / Upgraded 360° firing Magnum Tuning Spark Plugs/ Antigravity Lithium Battery 480 crank amps/ Custom LED Integrated Smoke Tail Light/ Shogun Frame Sliders /Pair Valve System Removed/ Ek Black & Gold Heavy Duty chain/ Supersprox Gold 43T Rear Sprocket/ Vortex 16T Steel Front Sprocket/CRG Bar End Mirrors/Galfer Wave Rotor on Rear with Rainbow Titanium Grade 5 Bolts/Custom Vinyl Designed Wheels/Pirelli Angel GT 2 tires/ Healtech Quickshifter / Zero Gravity Double Bubble Screen/ Brocks Penta Carbon Full exhaust system/ Custom Raised Rubber Permanent Tire Stickers/ HyperPro RSC Steering Damper / Motocomposite Carbon Fiber Fairing Accents/ Clear- See thru Clutch Cover/

Link | Top | Bottom

14isKing


14isKing's Gravatar

Joined: 02/16/19

Posts: 35

RE: If you've installed a Hyperpro damper
03/27/21 6:14 PM

No I have the version with the bracket support sleeves ...they bolt on to the steering head... You have to remove the oem bracket bolts off the left and right side steering head. Left side actually had a bolt ..easy money...Right side.. why! ??..they literally have a WEAK METAL Philip head screw in there and I believe with a ton of red loctite on it.
Trying not to strip the damn thing. Il just t dry and heat it for the 3rd time.


* Last updated by: 14isKing on 3/27/2021 @ 6:19 PM *


2012 Custom Matte Black-Silver/Orange Paint Scheme.
Secondary Flies out/ECU Flash & Tune by Nels (2WheelDynoWorks) **Updated to Brocks/GUHL Flash 2 package / PCV Map Switch (Savage Mode) / Upgraded 360° firing Magnum Tuning Spark Plugs/ Antigravity Lithium Battery 480 crank amps/ Custom LED Integrated Smoke Tail Light/ Shogun Frame Sliders /Pair Valve System Removed/ Ek Black & Gold Heavy Duty chain/ Supersprox Gold 43T Rear Sprocket/ Vortex 16T Steel Front Sprocket/CRG Bar End Mirrors/Galfer Wave Rotor on Rear with Rainbow Titanium Grade 5 Bolts/Custom Vinyl Designed Wheels/Pirelli Angel GT 2 tires/ Healtech Quickshifter / Zero Gravity Double Bubble Screen/ Brocks Penta Carbon Full exhaust system/ Custom Raised Rubber Permanent Tire Stickers/ HyperPro RSC Steering Damper / Motocomposite Carbon Fiber Fairing Accents/ Clear- See thru Clutch Cover/

Link | Top | Bottom

Rook


Rook's Gravatar

Joined: 03/28/09

Posts: 20589

RE: If you've installed a Hyperpro damper
03/28/21 11:12 AM

I never had any real problem removing those phillips head screws from the sides of the steering neck. Yeah I think I remember the one on the RH side was just there to fill the hole. Maybe Kaw planned that so a steering damper bracket would fit.

Maybe you will end up cutting a slot in the screw so you can use a regular screwdriver. Or maybe an easy out now while you have the head intact. That would give you an extra couple millimeters of depth you wouldn't need to drill inside the bolthole. Chop a small flat on either side of the button head and turn with an adjustable wrench and screwdriver at the same time? If you heat it, that will soften the metal. It shouldn't take a lot of heat to soften any lock-tite they used. I don't believe mine had lock-tite. You press the screwdriver while someone else turns with a wrench on the screwdriver handle?

I notice the threads in the LH hole feel a little rough when I remove and install my Hyper-Pro damper now. It's probably about time I run a thread restoring tap through there.


'08 MIDNIGHT SAPPHIRE BLUE Now Deceased

Link | Top | Bottom

piken


piken's Gravatar

Location: Phoenix, AZ

Joined: 08/27/15

Posts: 665

RE: If you've installed a Hyperpro damper
03/28/21 1:47 PM

Might take some disassembly but I'd use a hand held impact driver
if it's being tough and don't want to strip it.

Link | Top | Bottom

Rook


Rook's Gravatar

Joined: 03/28/09

Posts: 20589

RE: If you've installed a Hyperpro damper
03/28/21 10:21 PM

Good solution Piken. I saw one used a long time ago and it worked.


'08 MIDNIGHT SAPPHIRE BLUE Now Deceased

Link | Top | Bottom

14isKing


14isKing's Gravatar

Joined: 02/16/19

Posts: 35

RE: If you've installed a Hyperpro damper
03/29/21 4:12 PM

Thanks fellas... But since that last post reply..ive bought a JIS Impact screwdriver and still not budging..had a friend come over for a 2nd opinion so I can confirm im not crazy. It is in fact seized! I will try and heat the screw again but thats not really working either because its aluminum I believe. I read the service manual, doesn't specify anything about the screws other then they are there... does not have a locking agent symbol applied to its column either. Il keep banging away.Last resort is drilling it out and re-threading. Frustration is at a max and once again Kawasaki has me puzzled why? Thanks for your help!


2012 Custom Matte Black-Silver/Orange Paint Scheme.
Secondary Flies out/ECU Flash & Tune by Nels (2WheelDynoWorks) **Updated to Brocks/GUHL Flash 2 package / PCV Map Switch (Savage Mode) / Upgraded 360° firing Magnum Tuning Spark Plugs/ Antigravity Lithium Battery 480 crank amps/ Custom LED Integrated Smoke Tail Light/ Shogun Frame Sliders /Pair Valve System Removed/ Ek Black & Gold Heavy Duty chain/ Supersprox Gold 43T Rear Sprocket/ Vortex 16T Steel Front Sprocket/CRG Bar End Mirrors/Galfer Wave Rotor on Rear with Rainbow Titanium Grade 5 Bolts/Custom Vinyl Designed Wheels/Pirelli Angel GT 2 tires/ Healtech Quickshifter / Zero Gravity Double Bubble Screen/ Brocks Penta Carbon Full exhaust system/ Custom Raised Rubber Permanent Tire Stickers/ HyperPro RSC Steering Damper / Motocomposite Carbon Fiber Fairing Accents/ Clear- See thru Clutch Cover/

Link | Top | Bottom

Rook


Rook's Gravatar

Joined: 03/28/09

Posts: 20589

RE: If you've installed a Hyperpro damper
03/29/21 10:24 PM

I will try and heat the screw again but thats not really working either because its aluminum I believe.

No there are no aluminum bolts on the 14....at least I have never come across one on my Gen1 and I've replaced about every external bolt there is on the bike. The frame is aluminum though. I'd use a butane torch to keep the heat on the screw as much as you can and avoid paint damage. I guess the thing to do is heat the female hreads so they expand but on that big steering neck, I doubt it would be possible to heat it enough unless you used a huge blowtorch or something. If you drill you might get it out with an easy out. If you have to drill it copletely out, at least you can go to a larger bolt...or try your hand at one of those thread replacement plugs. Sucks to have this trouble with such a simple thing. Heat and squirt with Deep Creep. It's the best product for seized bolts and doesn't evaporate when heated. Most of the tension is on the head of the bolt. Even if you loosen the crust under the head, that's usually enough to break the threads free.


* Last updated by: Rook on 3/29/2021 @ 10:26 PM *


'08 MIDNIGHT SAPPHIRE BLUE Now Deceased

Link | Top | Bottom

islandninja


islandninja's Gravatar

Location:

Bintan Island, Indonesia

Joined: 12/13/16

Posts: 195

RE: If you've installed a Hyperpro damper
03/29/21 10:43 PM

Black Philips Head screws in the steering column

strange... when i installed the Hyperpro damper on my 2013' all i had to deal with on the steering column was a couple of stainless steel hex bolts


* Last updated by: islandninja on 3/29/2021 @ 10:45 PM *

Link | Top | Bottom

14isKing


14isKing's Gravatar

Joined: 02/16/19

Posts: 35

RE: If you've installed a Hyperpro damper
03/31/21 7:06 PM

Top screw...As you can see / Black Phillips
or JIS screws on right side. Had a neighbor come help... brought out his fancy Gold plated extractors and hit with torch. Did not budge.Even he was shocked lol. Ended up buying Free All Penetrating oil, Have not had time to jump back in on it but il let the spray penetrate and see if it can free it up..still have enough meat on the head to grab the screw.
LEFT SIDE
DONE RIGHT!

Definitely pain in the ass but I'm not done yet lol thanks for the help guys. I guess you got lucky on your year LOL.


* Last updated by: 14isKing on 3/31/2021 @ 7:10 PM *


2012 Custom Matte Black-Silver/Orange Paint Scheme.
Secondary Flies out/ECU Flash & Tune by Nels (2WheelDynoWorks) **Updated to Brocks/GUHL Flash 2 package / PCV Map Switch (Savage Mode) / Upgraded 360° firing Magnum Tuning Spark Plugs/ Antigravity Lithium Battery 480 crank amps/ Custom LED Integrated Smoke Tail Light/ Shogun Frame Sliders /Pair Valve System Removed/ Ek Black & Gold Heavy Duty chain/ Supersprox Gold 43T Rear Sprocket/ Vortex 16T Steel Front Sprocket/CRG Bar End Mirrors/Galfer Wave Rotor on Rear with Rainbow Titanium Grade 5 Bolts/Custom Vinyl Designed Wheels/Pirelli Angel GT 2 tires/ Healtech Quickshifter / Zero Gravity Double Bubble Screen/ Brocks Penta Carbon Full exhaust system/ Custom Raised Rubber Permanent Tire Stickers/ HyperPro RSC Steering Damper / Motocomposite Carbon Fiber Fairing Accents/ Clear- See thru Clutch Cover/

Link | Top | Bottom

Rook


Rook's Gravatar

Joined: 03/28/09

Posts: 20589

RE: If you've installed a Hyperpro damper
04/01/21 12:06 AM

Try using a bread tie wire to hold a rag soaked with the penetrating oil around the head over night. It doesn't look like you have much of a slot to grip with a screwdriver any more though. TRy cutting a straight slot with a dremmel. One person hold the screwdriver and the other turn the blade with an adjustable wrench maybe. Otherwise, a box end wrench will fit the handle if it's a hex handle. I have a feeling you're going to end up drilling though. That head isn't big enough to even cut much of a slot in.


'08 MIDNIGHT SAPPHIRE BLUE Now Deceased

Link | Top | Bottom

Hub


Hub's Gravatar

Joined: 02/05/09

Posts: 13718

RE: If you've installed a Hyperpro damper
04/01/21 6:34 AM

With a sharp pointed punch, hammer the edge, meaning, more a fulcrum point the farther out, and walk it out. Then a vice grip or pliers to twist the head. I've had my share but tip and I don't need a drill, just a 45° angle hit and she'll walk. Good luck


Tormenting the motorcycling community one post at a time

Link | Top | Bottom

Grn14


Grn14's Gravatar

Location: Montana

Joined: 02/25/09

Posts: 15511

RE: If you've installed a Hyperpro damper
04/01/21 10:24 AM

wow.Bummer.I think I'd go with a chisel with a very hard tip on it and do what hub says.Hit the edge and get a groove goin.Then just keep workin it around till loosened.I've done that on a few bolts.

Link | Top | Bottom

piken


piken's Gravatar

Location: Phoenix, AZ

Joined: 08/27/15

Posts: 665

RE: If you've installed a Hyperpro damper
04/01/21 11:27 AM

Impact driver with hex/torx bit if you can pound one in there and if that doesn't work
drill and tap.

Sometimes even just drilling will loosen and allow removal and
then tap if needed.

Link | Top | Bottom

14isKing


14isKing's Gravatar

Joined: 02/16/19

Posts: 35

RE: If you've installed a Hyperpro damper
04/01/21 11:56 AM

Right on Fellas.. all good options to try. Did get some bread wire and was able to slightly get underneath the head, applied, “Free All” Penetrating Oil and let it do it’s thing. Hopefully by the time I get off the job. Some of the gunk will be softened up to wrench on the head. I am able to grab it with a small pair of channel locks. The other question I had for you guys...Because we are using the front engine cover fairing bolt, how do you guys go about removing the bracket... and what do you recommend as far as putting Locking agent on all the bolts or just torquing to spec and call it a day. Thanks!


2012 Custom Matte Black-Silver/Orange Paint Scheme.
Secondary Flies out/ECU Flash & Tune by Nels (2WheelDynoWorks) **Updated to Brocks/GUHL Flash 2 package / PCV Map Switch (Savage Mode) / Upgraded 360° firing Magnum Tuning Spark Plugs/ Antigravity Lithium Battery 480 crank amps/ Custom LED Integrated Smoke Tail Light/ Shogun Frame Sliders /Pair Valve System Removed/ Ek Black & Gold Heavy Duty chain/ Supersprox Gold 43T Rear Sprocket/ Vortex 16T Steel Front Sprocket/CRG Bar End Mirrors/Galfer Wave Rotor on Rear with Rainbow Titanium Grade 5 Bolts/Custom Vinyl Designed Wheels/Pirelli Angel GT 2 tires/ Healtech Quickshifter / Zero Gravity Double Bubble Screen/ Brocks Penta Carbon Full exhaust system/ Custom Raised Rubber Permanent Tire Stickers/ HyperPro RSC Steering Damper / Motocomposite Carbon Fiber Fairing Accents/ Clear- See thru Clutch Cover/

Link | Top | Bottom

Rook


Rook's Gravatar

Joined: 03/28/09

Posts: 20589

RE: If you've installed a Hyperpro damper
04/02/21 11:00 AM

With a sharp pointed punch, hammer the edge, meaning, more a fulcrum point the farther out, and walk it out. Then a vice grip or pliers to twist the head. I've had my share but tip and I don't need a drill, just a 45° angle hit and she'll walk. Good luck

I was able to extract a bolt the head broke off of that way. I used a scribing tool with the point set on a small ridge left where the head snapped off. It took some time but it worked. Of course, the head was broke off and the head is probably where most of the tension comes from. Then again, with the head on, you have more leverage.

The other question I had for you guys...Because we are using the front engine cover fairing bolt, how do you guys go about removing the bracket... and what do you recommend as far as putting Locking agent on all the bolts or just torquing to spec and call it a day. Thanks!

The fuel tank fairing bolt? Yeah, that makes removing the fuel tank fairing a real PITA. You have to take the whole friggin bracket off. With my Gen1, I install the fuel tank fairing tabs under the side fairing tabs where they overlap on that little post. The damper and fuel tank fairing stay on when I take the fairings off. IDK if that will work with Gen2 fairings. I have an extra fuel tank fairing and I'm planning to cut the tab that goes under the steering damper bracket out someday. Then the fuel tank cover can come off and the damper can stay on the bike forever. I will have to figure some way to fasten the modded fuel tank cover in place because the only other thing holding it down are those projections that go into the gromets.

I torqued all the bracket bolts as specced and used blue locktite. It's never come loose. I torque the clamp on the tube to what Hyper-Pro specs. I recently replaced all the bolts with Ti and I think I used copper anti-seize and torqued about 30% less. Nothing has come loose. That little clamp screw I would torque as specced and use Lock-tite. The button head bolt that goes in the heim joint, I would not torque to spec but I would use Lock-tite. I had a hard time getting that out to replace it with the Ti bolt. 10 ft lb is crazy for a button head bolt. I used about 7 ft lb and the Lock-tite will hold it if it ever gets loose. You just have to check them every so often. The bolt that fastens the clamp to the bracket, I guess I might go full spec on that because you'll never see it again unless you remove the tube. I replaced that one with Ti too and it came out without much trouble after torqued to spec.


* Last updated by: Rook on 4/2/2021 @ 11:18 AM *


'08 MIDNIGHT SAPPHIRE BLUE Now Deceased

Link | Top | Bottom

14isKing


14isKing's Gravatar

Joined: 02/16/19

Posts: 35

RE: If you've installed a Hyperpro damper
04/04/21 3:49 PM

Well...guys... I have Extremely Epic news!! After about week of goin back and forth with this screw..
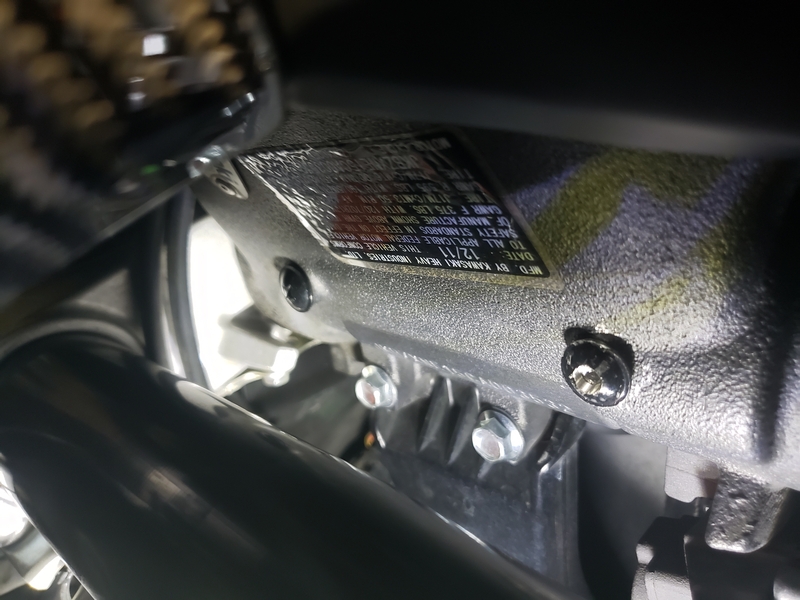
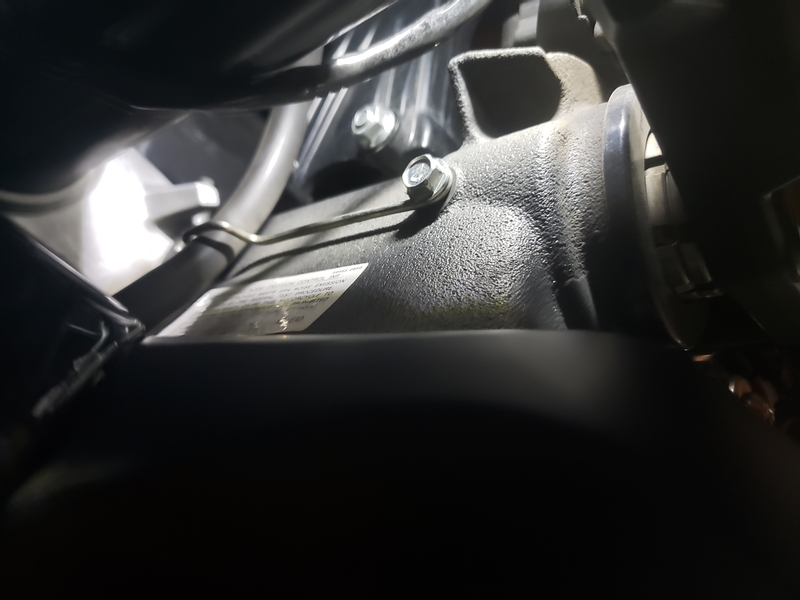
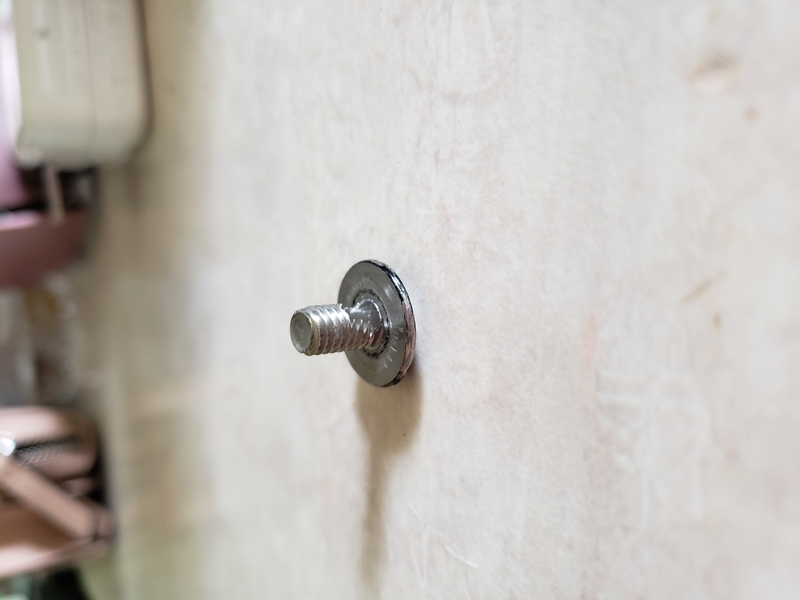
I finally got it to budge this fine Easter Sunday Morning.??????????????...The best part ... I did not damage the screw housing or threads astonishingly. I carefully just kept using my extractors but once the hole in the head of the screw was becoming to deep , just said screw it and was in the mindset its drill and tap time... low and behold as its goin screw makes a popping sound and then begins to screw out ????... There was some yellowish dust that came out on the screw underneath the head but I didn't find loctite.. really weird..but I am beyond stoked! THANK YOU GUYS A BUNCH!I appreciate your input and knowledge on the matter. You guys are awesome.


2012 Custom Matte Black-Silver/Orange Paint Scheme.
Secondary Flies out/ECU Flash & Tune by Nels (2WheelDynoWorks) **Updated to Brocks/GUHL Flash 2 package / PCV Map Switch (Savage Mode) / Upgraded 360° firing Magnum Tuning Spark Plugs/ Antigravity Lithium Battery 480 crank amps/ Custom LED Integrated Smoke Tail Light/ Shogun Frame Sliders /Pair Valve System Removed/ Ek Black & Gold Heavy Duty chain/ Supersprox Gold 43T Rear Sprocket/ Vortex 16T Steel Front Sprocket/CRG Bar End Mirrors/Galfer Wave Rotor on Rear with Rainbow Titanium Grade 5 Bolts/Custom Vinyl Designed Wheels/Pirelli Angel GT 2 tires/ Healtech Quickshifter / Zero Gravity Double Bubble Screen/ Brocks Penta Carbon Full exhaust system/ Custom Raised Rubber Permanent Tire Stickers/ HyperPro RSC Steering Damper / Motocomposite Carbon Fiber Fairing Accents/ Clear- See thru Clutch Cover/

Link | Top | Bottom

Rook


Rook's Gravatar

Joined: 03/28/09

Posts: 20589

RE: If you've installed a Hyperpro damper
04/04/21 9:22 PM

I bet that felt really good! You probably already have the Hyper-Pro on there. I was going to suggest you try threading in the new bolt very carefully and if you feel any resistance, run a thread restoring tap or a cleaner tap through. I have a set of Lang metric thread restoring taps that worked well for me. They do remove a bit of metal but that is probably inevitable if the threads were at all damaged or distorted. The threads might loosen up but that;s not as bad as if they get damaged worse by putting the bolt in and out a few times. I had a fairing screw bolthole that was sticky and it got worse and worse until it destroyed the aluminum screw. That's when I restored it with the tap lubed with Tap Magic cutting oil (supposed to be REALLY great stuff compared to normal cutting oil-you will probably have to order online). I think the bolthole is a tiny bit loose now. I got a few chips of metal on the tap when I took it out but the threads work. Probably would have been better to do that sooner but I thought it was just built up Lock-tite. A steel bolt might have damaged the threads a lot worse. All's good now. Lock-tight keeps it secure.


* Last updated by: Rook on 4/4/2021 @ 9:28 PM *


'08 MIDNIGHT SAPPHIRE BLUE Now Deceased

Link | Top | Bottom

Hub


Hub's Gravatar

Joined: 02/05/09

Posts: 13718

RE: If you've installed a Hyperpro damper
04/04/21 9:47 PM

There are threads missing off that bolt, yes?

The other question I had for you guys...Because we are using the front engine cover fairing bolt, how do you guys go about removing the bracket...

Front engine cover fairing bolt? Bracket? That might call for a photo or if you figured it out no biggie. Front engine cover threw me there. Then a fairing bolt. With your photo I can see the fairing bolts that hold that main Y kind of bracket to hold the nose. Those kind of nuts are built-in-compression-types that eliminate a flat and lock washer, and do not use locker.

What bracket are we talking? This aftermarket mounds down both sides of the neck of the frame, yes? If you mean that wire bracket for the clutch hose, are we saying place it piggyback style and bend to fit? You want that hose wire in place so the fork swing won't crush it at the fork stop that is sticking up. How far off am I aftermarket bracket mount and where it's mounted?


and what do you recommend as far as putting Locking agent on all the bolts or just torquing to spec and call it a day. Thanks!

Well, lets put it this way, if you are going to use up bolt threads adding a bracket, or say you count 5 thread winds out of the bracket and that's all the length had, 5 is minimum for more hand tightening, but torque setting might not pull the threads out; but I prefer more thread for a torque tool. Just saying. I rather go locker and hand. Why? I can use less torque using liquid and not over tighten with hand, knowing the locker is not about to back out with a soft tightening, meaning, just right, or not loose and a pound or 3 off torque.

And say I more hand tighten aftermarket hardware with locker. My drop is not along the length of the bolt, but more a measure of when the threads hit the last 5 winds of the thread. I take a toothpick, enter the threaded hole is one measurement. The thickness of the bracket and those lost threads not needing any, and all that subtracting off the length of the bolt, etc.... or I'm back with the tools and break-free trying to melt the length of that liquid line you made, not the measured drop on the right spot.


Tormenting the motorcycling community one post at a time

Link | Top | Bottom

Rook


Rook's Gravatar

Joined: 03/28/09

Posts: 20589

RE: If you've installed a Hyperpro damper
04/05/21 8:21 PM

Front engine cover fairing bolt? Bracket? That might call for a photo or if you figured it out no biggie. Front engine cover threw me there. Then a fairing bolt. With your photo I can see the fairing bolts that hold that main Y kind of bracket to hold the nose. Those kind of nuts are built-in-compression-types that eliminate a flat and lock washer, and do not use locker.

I think he means the fuel tank cover fairing.

What bracket are we talking? This aftermarket mounds down both sides of the neck of the frame, yes? If you mean that wire bracket for the clutch hose, are we saying place it piggyback style and bend to fit? You want that hose wire in place so the fork swing won't crush it at the fork stop that is sticking up. How far off am I aftermarket bracket mount and where it's mounted?

The bracket that supports the tube. It mounts over the front center tab on the fuel tank fairing and and you use a longer bolt to fasten both the bracket and the fuel tank fairing down. That bracket also has an arm on each side that mounts to those black phillips screws on the steering neck of the frame.

Well, lets put it this way, if you are going to use up bolt threads adding a bracket, or say you count 5 thread winds out of the bracket and that's all the length had, 5 is minimum for more hand tightening, but torque setting might not pull the threads out; but I prefer more thread for a torque tool. Just saying. I rather go locker and hand. Why? I can use less torque using liquid and not over tighten with hand, knowing the locker is not about to back out with a soft tightening, meaning, just right, or not loose and a pound or 3 off torque.
And say I more hand tighten aftermarket hardware with locker. My drop is not along the length of the bolt, but more a measure of when the threads hit the last 5 winds of the thread. I take a toothpick, enter the threaded hole is one measurement. The thickness of the bracket and those lost threads not needing any, and all that subtracting off the length of the bolt, etc.... or I'm back with the tools and break-free trying to melt the length of that liquid line you made, not the measured drop on the right spot.

I don't recall ever loosing a bolt that was lock-tited, not even a fairing bolt tightened less than snug, just don't use Lock-tite on the well nut bolts or the well nut will spin in the rubber with the bolt and the bolt never thread out.

I'd still tighten these because it could be a stress point if you ever do have an oscillation in the front wheel. All they spec is 5 ft lbs which to me is hand tight. The clamp is 4 ft lbs. I guess I'd go to spec on that clamp, not over.

Under-torque that button head on the arm for sure maybe to about 6 ft lbs. Use lock-tight. I almost had to put that arm that fastens to the clipon in a vice to break that button head loose. It was torqued 10ft lb and Locktited. You will want to remove that button head because the o-ring on the ball joint is going to break eventually. You can pick up a similar O-ring at Ace to replace it.


* Last updated by: Rook on 4/5/2021 @ 8:26 PM *


'08 MIDNIGHT SAPPHIRE BLUE Now Deceased

Link | Top | Bottom


Welcome to zx14ninjaform.com!
 
New Topic Reply
Next Page

Page: 1 2

Previous Page

New Post

Please login to post a response.