


Fuel Tank Removal
It’s best to have the bike on a rear stand and positioned perpendicular to the ground for fuel tank removal. The side stand will work to support the bike for this procedure, however the angle that the bike is at while on the side stand makes propping the tank unsafe. If the bike cannot be positioned straight up and down, I would recommend removing the tank altogether or securing it by hanging the raised front from a sturdy overhead structure.
Do First:
Turn ignition switch off.
Remove left and right foremans, left and right ram air tube covers and fuel tank fairing (Fairings Removal).
Disconnect battery negative ground cable from frame (see Battery Removal, steps 1 2, and 3).
Open the fuel tank cap to release any pressure in the tank.
Syphon as much gas from the tank as possible if it is not already nearly empty.
Remove seat
Tools
ratchet
10mm socket
folded cloth
old bed sheet
empty 2 liter soda bottle
plastic wrap secured by a rubber band
Removal
1. Using a 10mm socket, remove the two front bolts and the two rear bolts. The rear bolts have washers that lay atop the the gas tank dampers.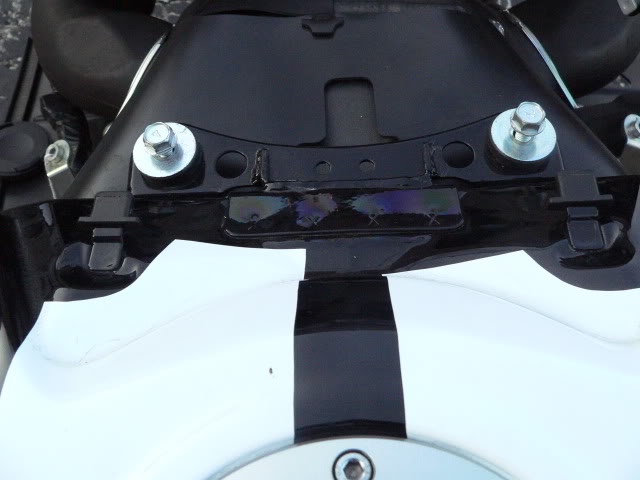
2. Remove the hoses at the back of the tank by pinching the retainer ring and working it back off of the nipple that the hose is attached to. Twist the hose on the fitting to “unstick” it. Push the hose off with thumbnails against the end of the hose. There is a hose on either side of the back of the tank and a third hose on California models. Probably Euros have 3 also. If any gas at all comes out of any of these hoses, it will only be a few drops. Wipe any spill up with a dry rag. 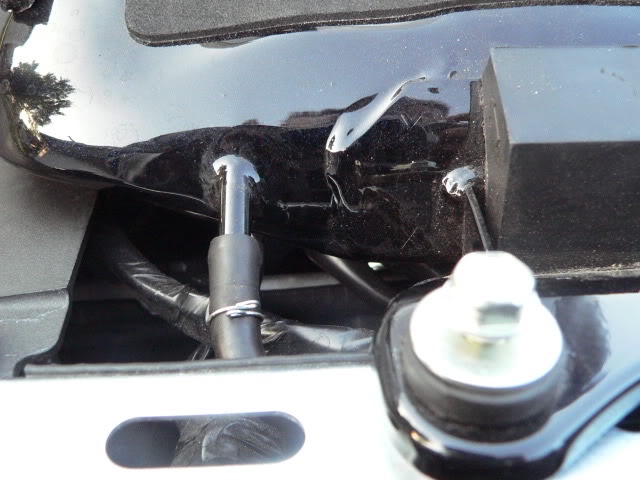
To prop the front of the tank:
To prevent accidental falling of the fuel tank, prop the tank only if the bike is in a vertical position on a rear stand. If the side stand is the only support available for the bike, remove the tank or hang the front of the tank from some secure, overhead structure rather than propping it.
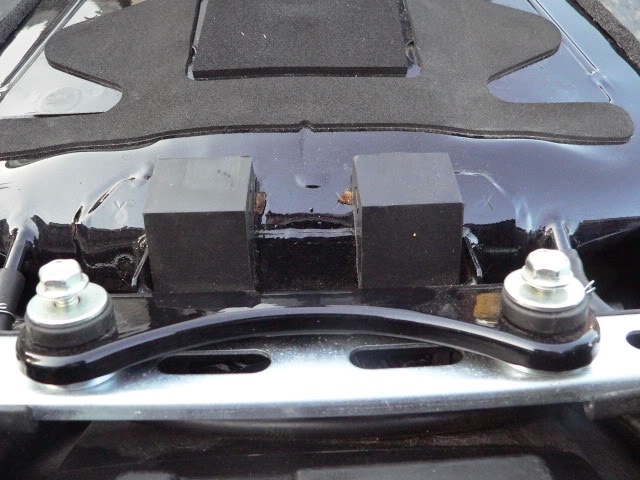
Grasping the fuel tank by the front and rear mounts, lift up 1 inch on both ends and then elevate the front of the tank. Be careful not to push the two cube shaped rubber dampers off the bottom bracket but if you do, they may be re-secured with fresh rubber cement or double sided tape. Also be careful to avoid pulling the two electrical harnesses with short wires on the back of the tank.
Carefully place the rear fuel tank mount on the rear fuel tank bracket. I usually have a folded cloth over the rear fuel tank bracket to avoid scraping the tank.
Place a 2 liter soda bottle between the front bottom of the tank and the top of the air box as shown. Use caution. The tank is not secure in this position but it is convenient and fairly safe for some tasks that require fuel tank compartment access. Any work on the tank itself should only be done with the tank removed to avoid dropping the tank.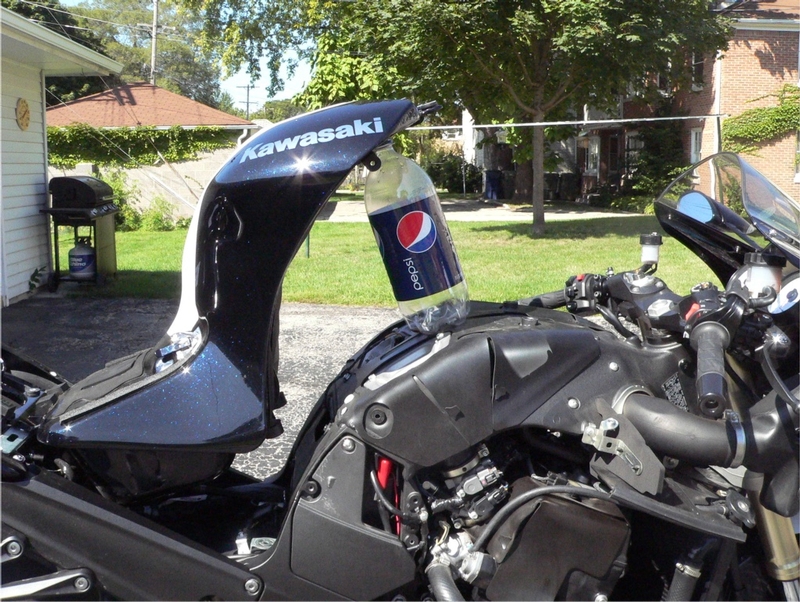
To prop the back of the tank
With the fuel tank bolts removed and the tank resting on its front mounts, lift the back of the tank. Wad up an old bed sheet and stuff it under the bottom edges of the tank to elevate the rear. 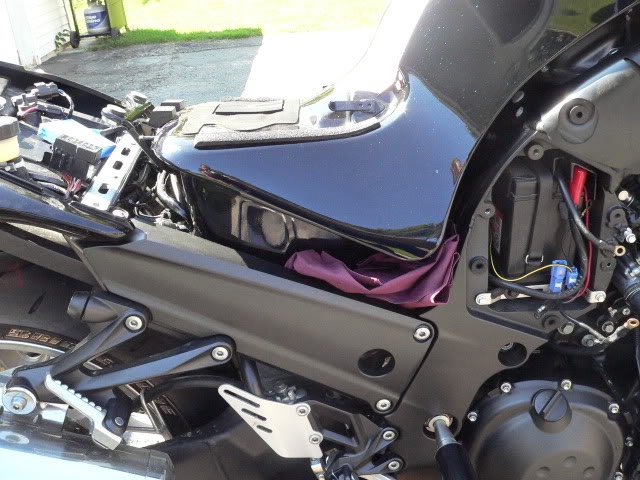
To Remove the tank:
3. With front fuel tank bracket resting on its mounts, lift the back of the tank slightly and find the two black electrical connectors at the back left corner. One is for the fuel pump and the other is for the fuel level sensor. 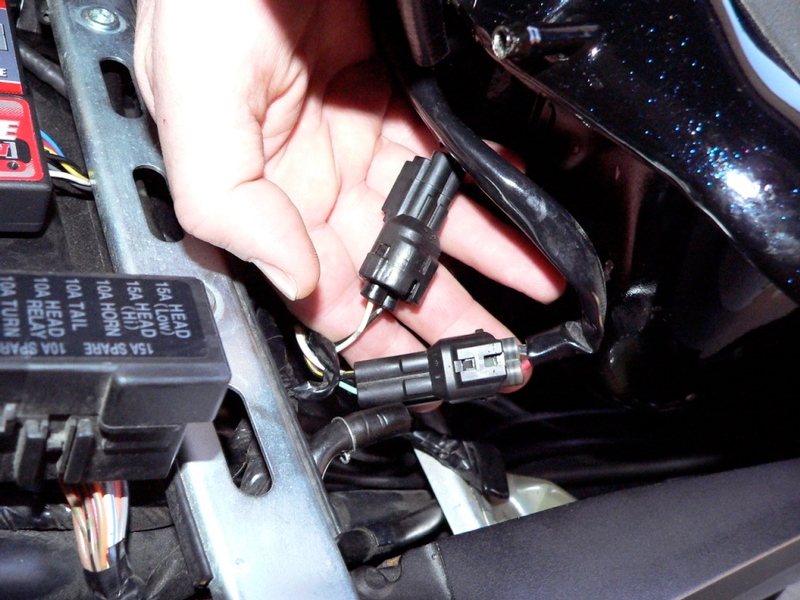
I normally prop the back of the tank (see To Prop the Back of the Tank, above) with a bed sheet while I work on these lead connectors and then lower the tank to proceed.
4. Open the catch on each lead by lifting the tab with your thumb while pulling the male and female halves apart.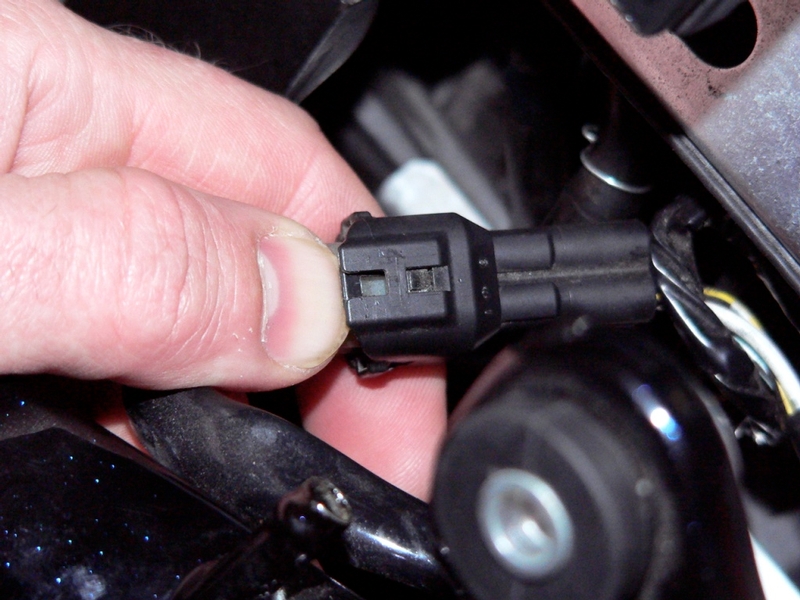
5. Disconnect the fuel hose from the fuel pump delivery pipe (see FUEL HOSE REMOVAL, steps 1, 2 and 3).
6. The fuel tank is now free. Grasp the fuel tank by the front and rear mounting brackets and lift straight up to remove the fuel tank.
If the fuel tank will be detached from the bike for some time, plastic wrap secured by a rubber band may be use to help prevent any dripping from the nipples at the back of the tank and on the delivery pipe.
The fuel pump is meant to be immersed in gasoline. I try not to let it sit dry for too long.
Installation
7. Connect the fuel hose to the fuel pump delivery pipe (see FUEL HOSE REMOVAL, step 9).
8. Place the front fuel tank mount in position on the air box and lift the rear mount up enough to access the fuel pump and fuel level sensor lead connectors. Stuffing the bed sheet in the bottom of the mud flap will be handy to hold the tank up again.
Connect the fuel pump lead and the fuel level sensor lead (steps 3 and 4, above). Be sure the leads are routed correctly.
Place the fuel tank flat on both of its mounts.
9. Push the hoses back on the nipples at the back of the tank.
Position the spring clip retainers on the hoses and over the flared tip of the nipples.
10. Use a 10 mm socket to fasten 4 bolts (2 washers under bolt heads on rear bracket) into fuel tank mounts. If the front and back bolts do not thread in smoothly, it is probably because the fuel tank bracket has been moved out of orientation to the front mount (see FUEL TANK AND MUDFLAP BRACKETS REMOVAL, step 2 ). It is typical for the fuel tank bolt holes to not quite match up to the mounts. Do as you see fit so the threads are not damaged.
There is no torque spec for the fuel tank mounting bolts. I avoid over-tightening them so that the rubber dampers are not distorted.
Connect the battery negative ground cable to the frame (see Battery Removal, step 11).
Check for leakage from fuel hose joint (see final comments, FUEL HOSE REMOVAL).
Install the left and right foremans, left and right ram air tube covers and fuel tank fairing (Fairings Removal).
Install seat.
* Last updated by: Rook on 7/7/2018 @ 10:37 AM *


 and do that if you are the only one asking, Coots but thank you for the suggestion to have a special section for my HOw Tos. (maybe I could just include the links in my signature. what do you think? JK
  )
)